
In Windows, every application runs with specific processor resources allotted to them by the system. Windows assigns a priority level for each process to determine how much power should be given to each running application. The higher the priority level is, the better your program runs.
Typically, there are six priority levels: Realtime, High, Above Normal, Normal, Below Normal, Low. The priority levels are assigned to different processes automatically by the system. However, you do have the option to set the priority manually if you think a certain application deserves more resources.
Note: If you decide to manually assign priority, the changes are not permanent. Once you close the program or restart your PC, the priority you set will be back to default.
Method 1: Change CPU Process Priority Of Running Application in Task Manager
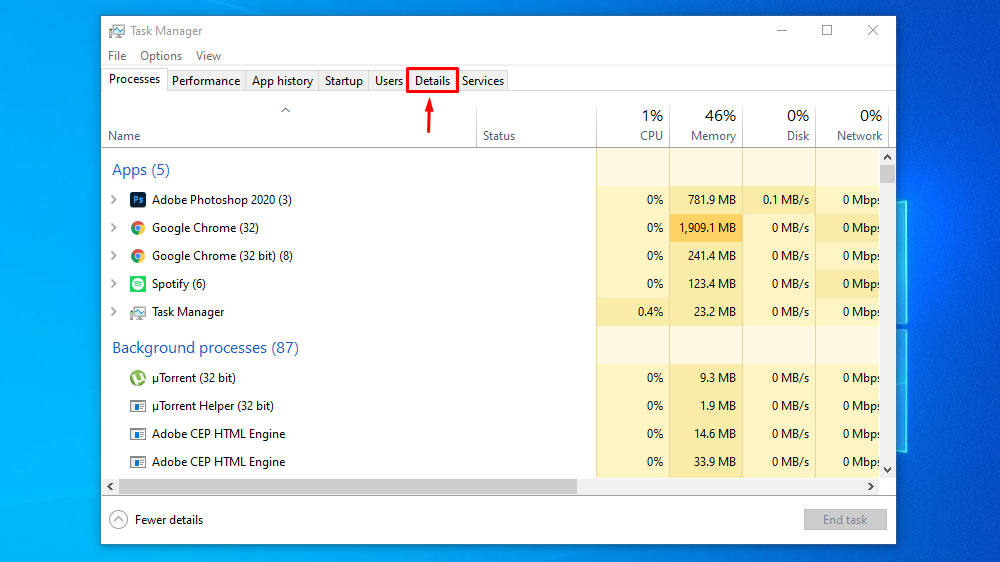
1. Open Task Manager and click on the Details tab.
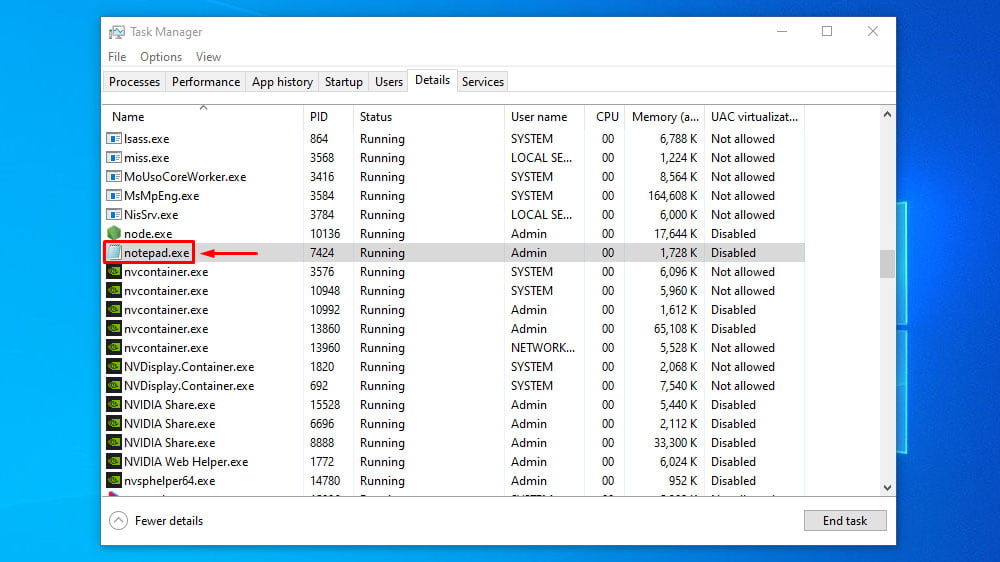
2. Find the process of the program you want to change the priority.
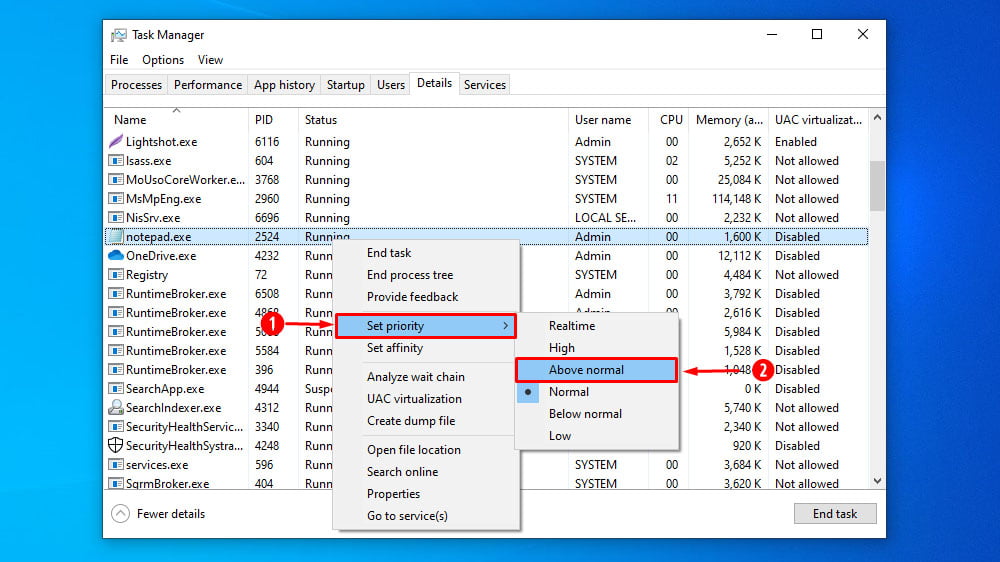
3. Right-click on the process, hover over the Set Priority, and then click on the priority level you want to give to your program.
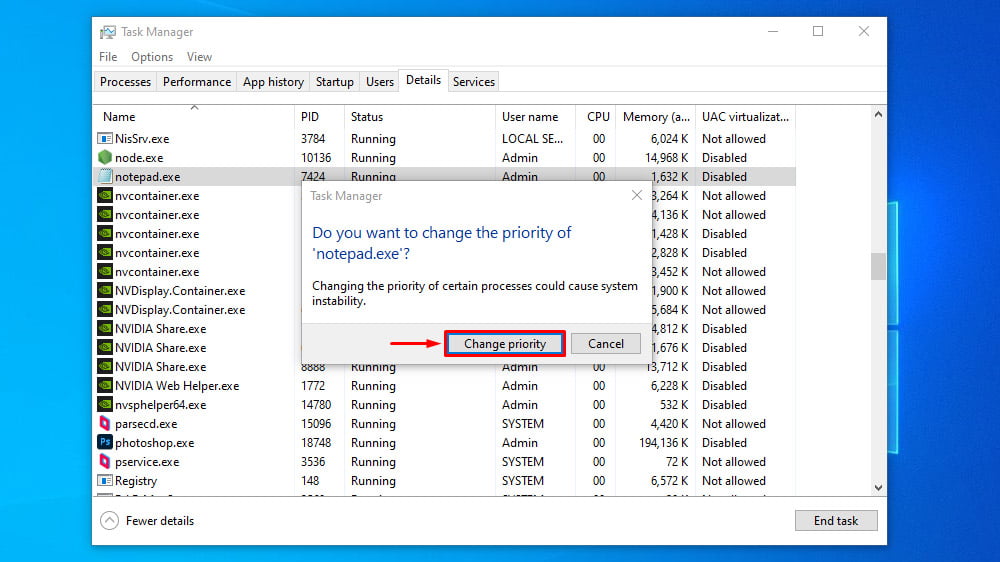
4. Click on Change priority on the confirmation dialog box.
Method 2: Change CPU Process Priority Of Running Application Using Command Prompt
1. Run Command Prompt as Administrator.
2. Type the following command in the command prompt window and press Enter.
wmic process where name="ProcessName" CALL setpriority "PriorityLevelName"or
wmic process where name="ProcessName" CALL setpriority PriorityLevelIDNote: Replace the “ProcessName” in the command with the name of the actual running process and “PriorityLevelID” or “PriorityLevelName” with the Priority Level ID or Priority Level Name provided in the below table.
For example:
wmic process where name="notepad.exe" CALL setpriority "Above normal"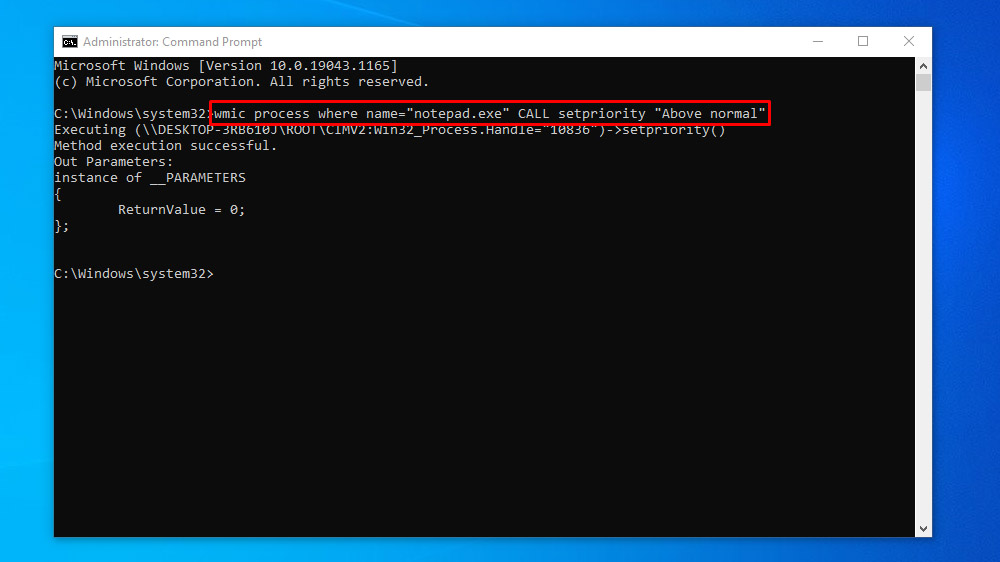
OR
wmic process where name="notepad.exe" CALL setpriority 32768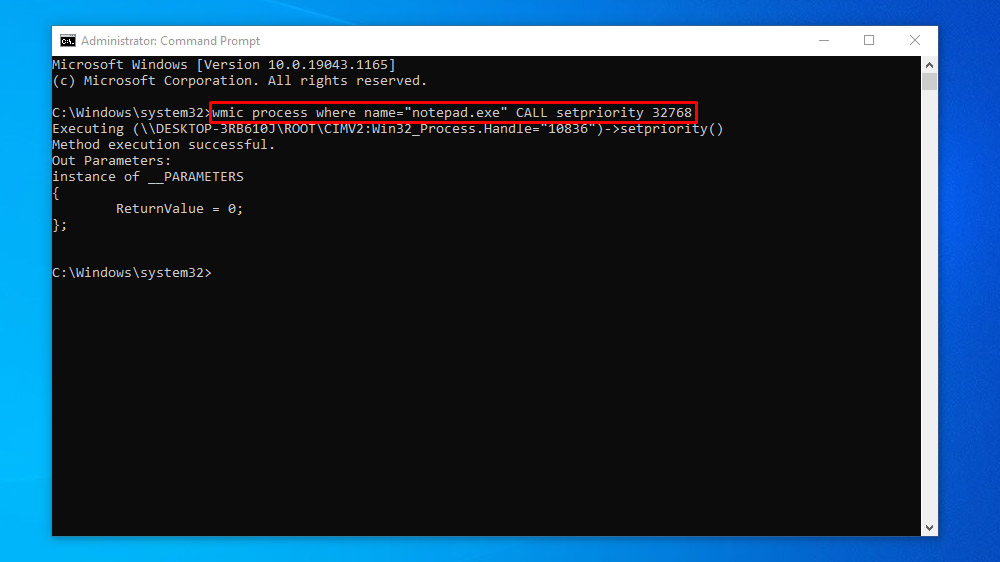
| Priority Level ID | Priority Level Name |
|---|---|
| 256 | Realtime |
| 128 | High |
| 32768 | Above normal |
| 32 | Normal |
| 16384 | Below normal |
| 64 | Low |
Method 3: Change CPU Process Priority Of Running Application Using PowerShell
1. Run Powershell.
2. Type the following command in the command prompt window and press Enter.
Get-WmiObject Win32_process -filter 'name = "ProcessName"' | foreach-object { $_.SetPriority(PriorityLevelID) }Note: Replace the “ProcessName” in the command with the name of the actual running process and “PriorityLevelID” with the Priority Level ID provided in the below table.
For example:
Get-WmiObject Win32_process -filter 'name = "notepad.exe"' | foreach-object { $_.SetPriority(32768) }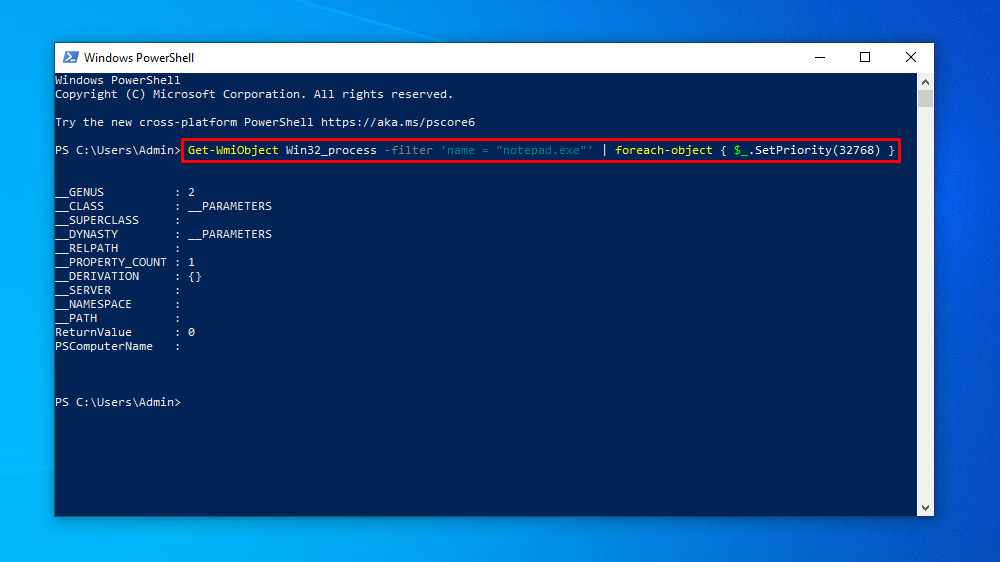
| Priority Level ID | Priority Level Name |
|---|---|
| 256 | Realtime |
| 128 | High |
| 32768 | Above normal |
| 32 | Normal |
| 16384 | Below normal |
| 64 | Low |