Windows 10 had a major overhaul in the user interface compared to what we have seen in the older versions of the operating system. However, for some part, Microsoft has opted to keep much of the core features the same, including its font choice.
Segoe UI has been a Windows default font for a long time, and it looks notably good on Windows 10. However, supposedly you decided to change the system font to the font of your liking. But now, you don’t know how to restore the default system font, then dont worry. We got you covered.
The below guide will show you how to restore the default system font in Windows 10.
Steps to Restore Default Font Settings in Font Settings:
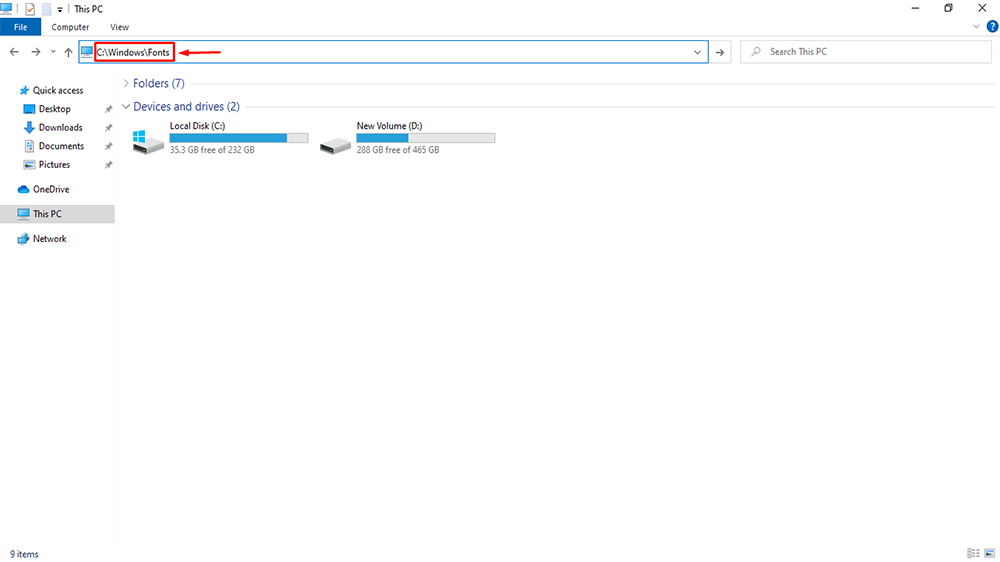
1.1. Open File Explorer and type C:\Windows\Fonts in the Address bar.
Or
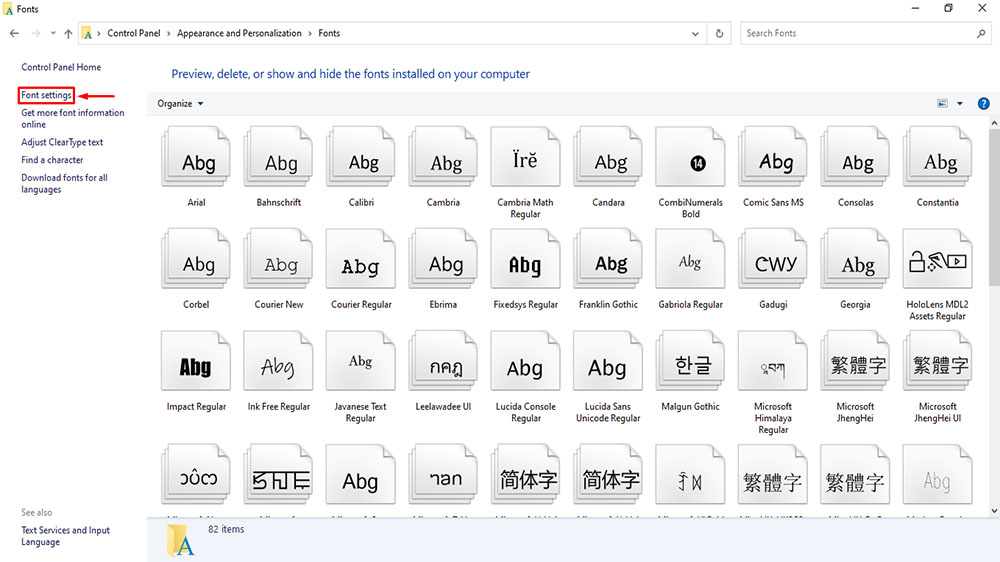
1.2. Open Control Panel and go to Appearance and Personalization > Fonts.
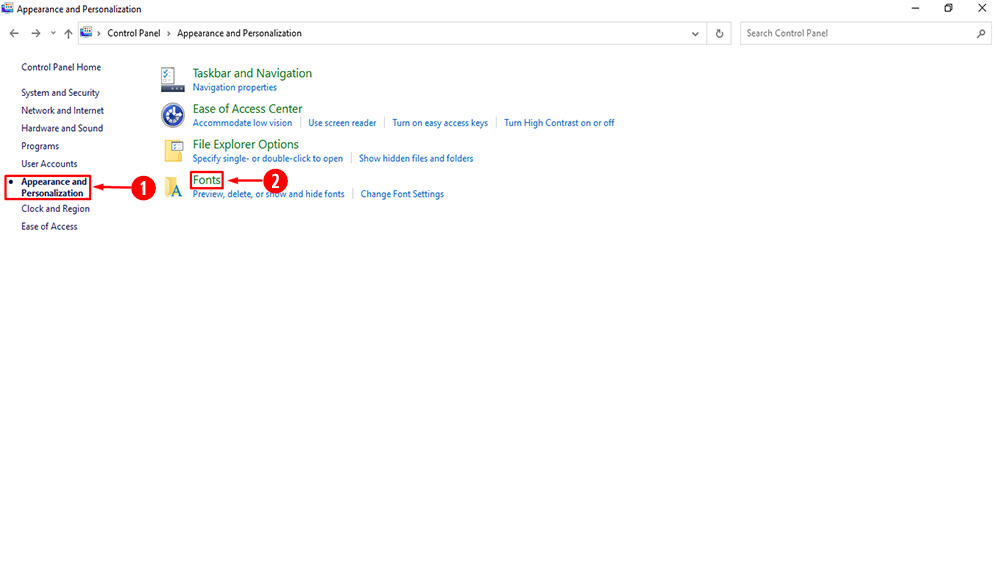
2. Now click on Font settings.
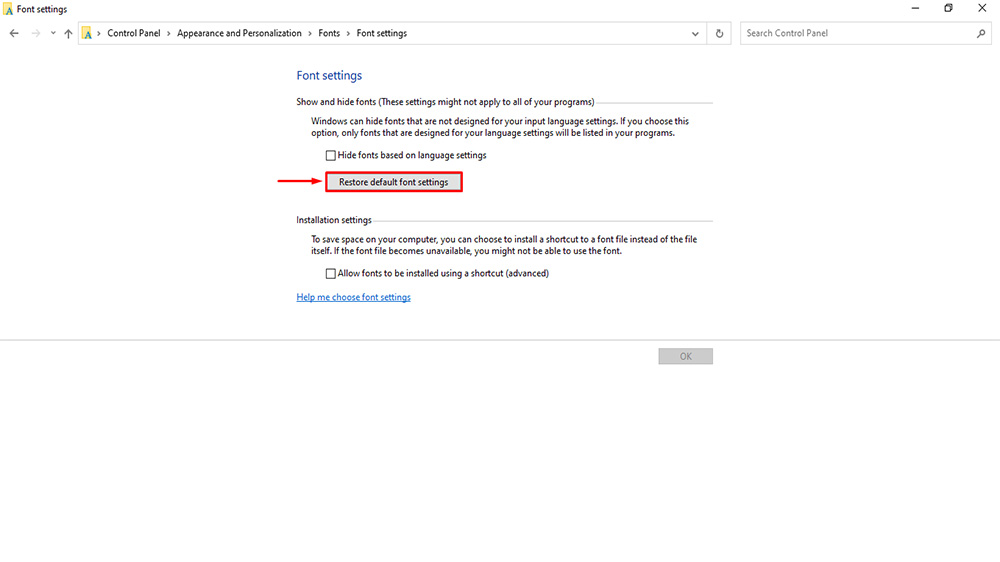
3. Click on the Restore default font settings.
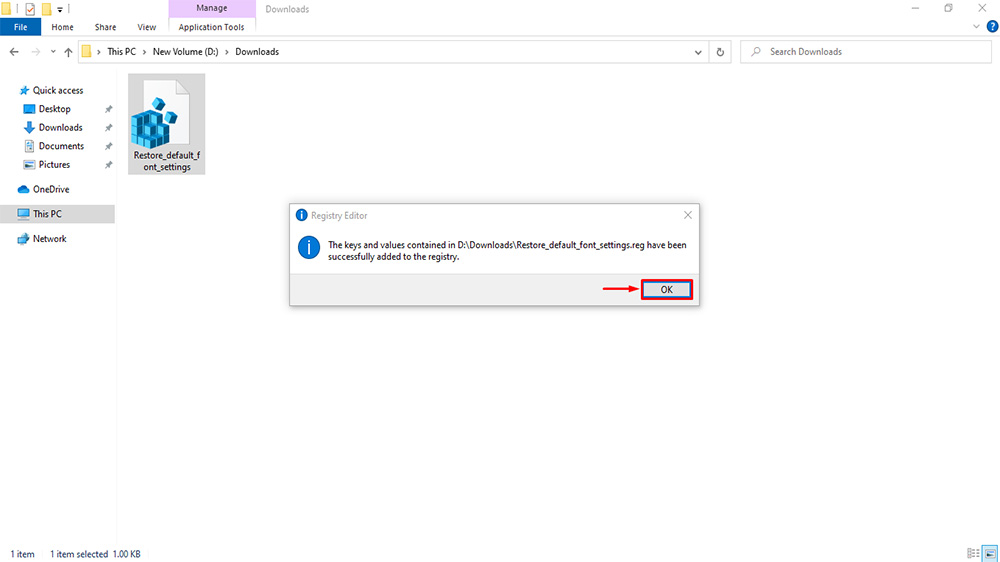
Steps to Restore Default Font Settings using a REG file:
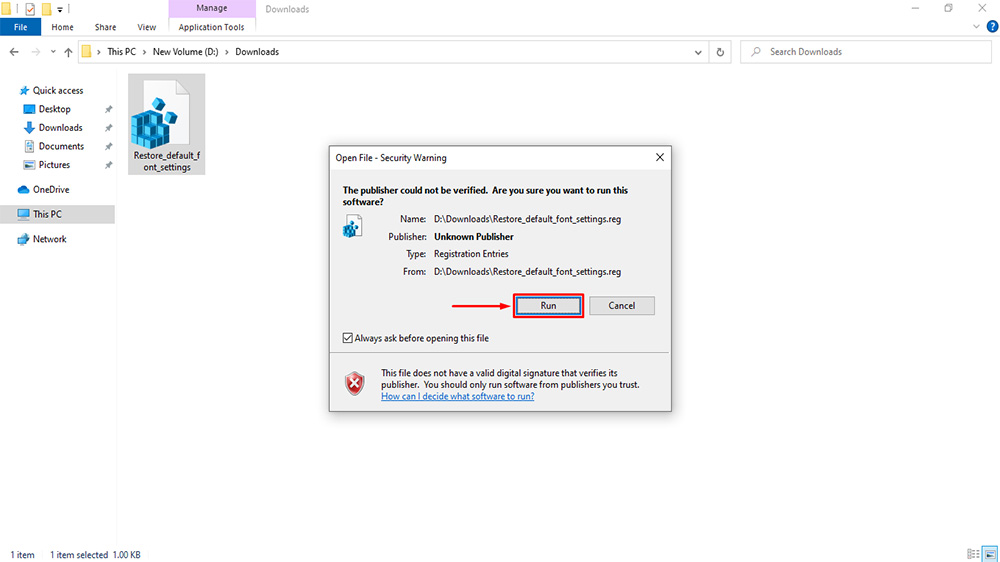
1. Download the Restore_default_font_settings.reg file.
2. Once you download the file, you can either right-click on the file and select merge or double-click the file to open it.

3. If Security Warning windows pop up, click on Run.
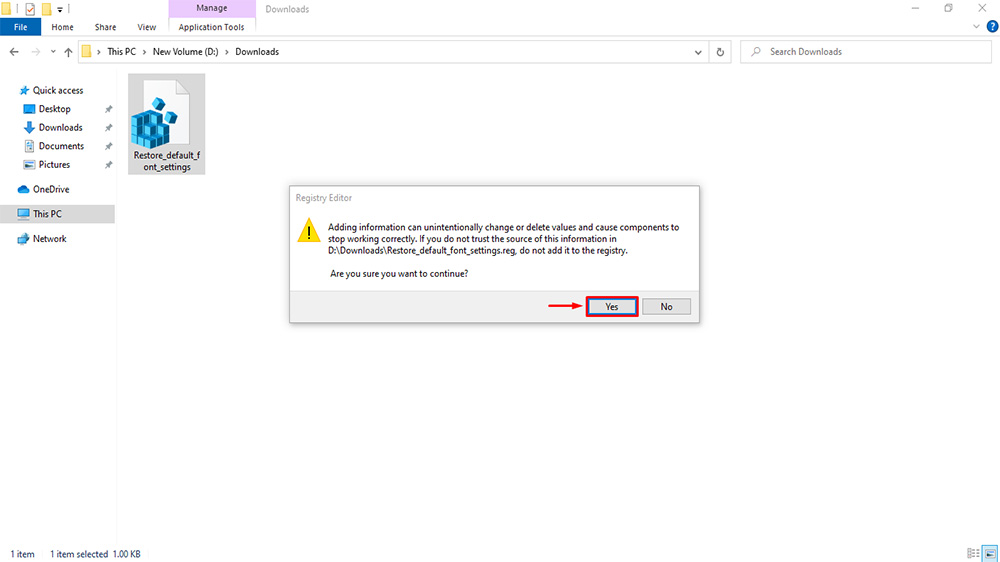
4. Now click on Yes in the User Account Control window.

5. Click Yes on the Registry Editor window.
6. Now click OK on the Registry Editor window with the confirmation message.