Windows Explorer is the file management program in Windows 10 that lets users interact with files, folders, libraries, and network connections and allows users to perform actions related to them. It also lets users access the desktop, the taskbar, and the Start menu to search for files and related components, launch programs, etc.
Windows Explorer in Windows 10 is automatically launched when you start your PC. So, if you’re facing any problem doing any of the actions mentioned above, then simply restarting the explorer.exe process can help you solve the problem. The below guide will show you how to restart the explorer.exe process in Windows 10.
Steps to automatically restart explorer.exe process in Task Manager:
1. Open Task Manager and look for the Windows Explorer process in the Processes tab.
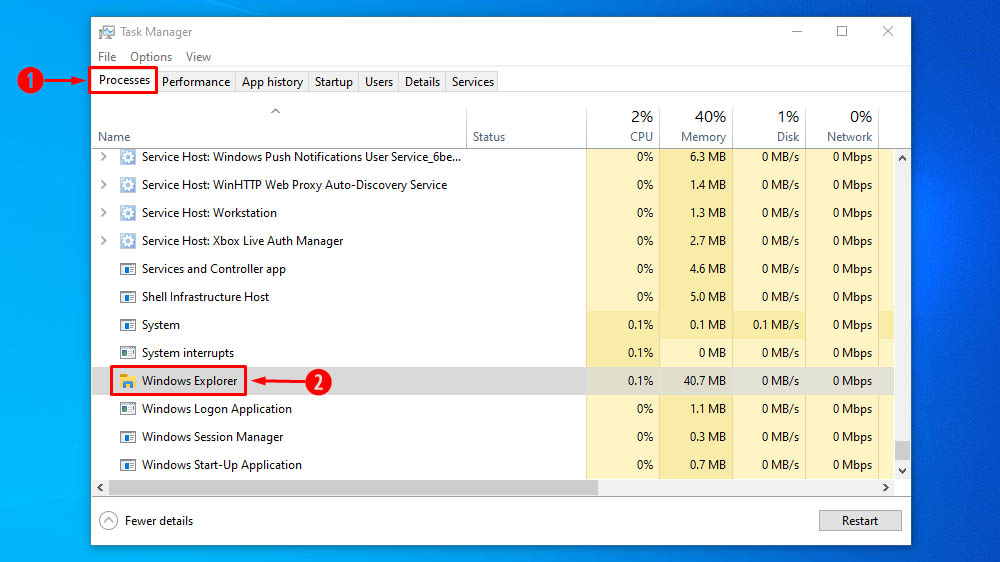
2. Right-click on the process and click on Restart or click on the Restart button.
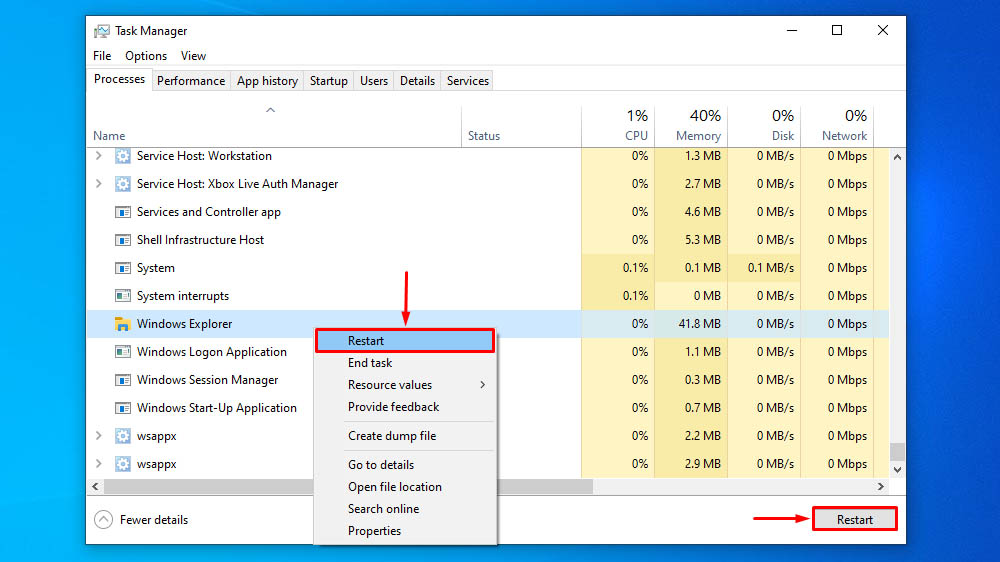
3. Windows Explorer will automatically restart again.
Steps to manually restart explorer.exe process in Command Prompt (CMD):
1. Open Command Prompt.
2. Type the following command in the command prompt window and press Enter to stop the Windows Explorer process.
taskkill /f /im explorer.exe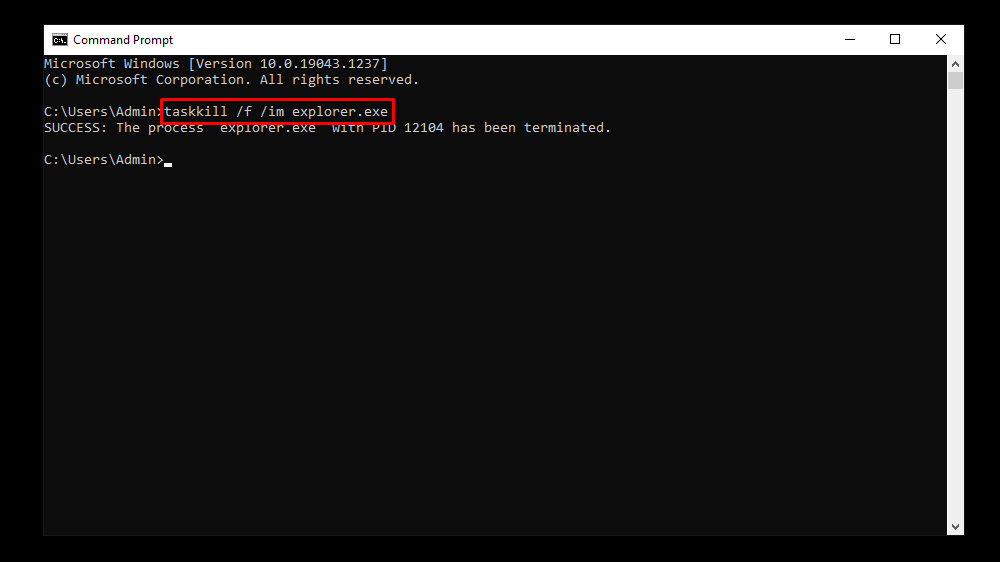
3. Type the following command in the command prompt window and press Enter to start the Windows Explorer process again.
start explorer.exe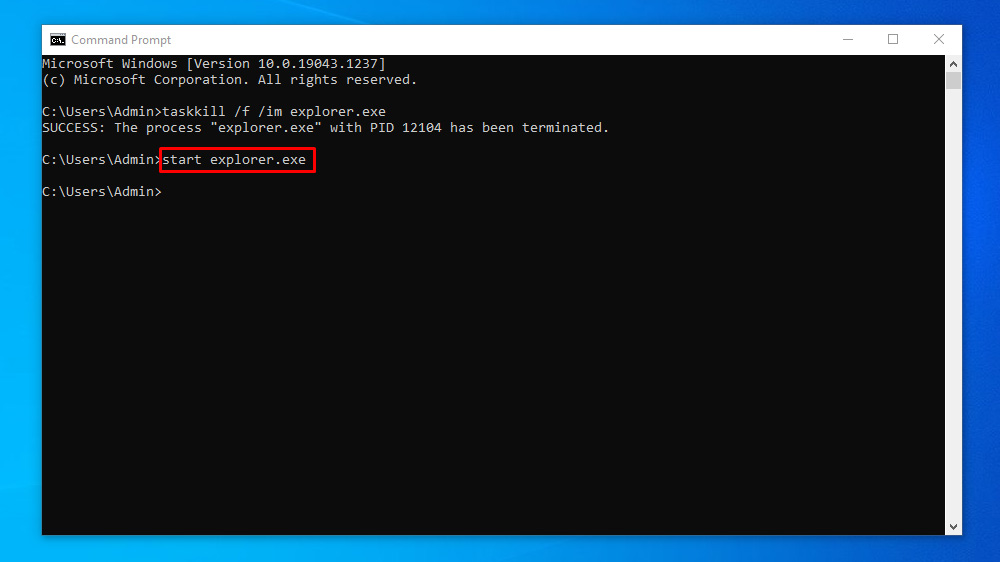
Steps to stop explorer from Taskbar context menu:
1. Press Ctrl + Shift simultaneously on your keyboard and right-click on the Taskbar area.
2. Now click on Exit Explorer.
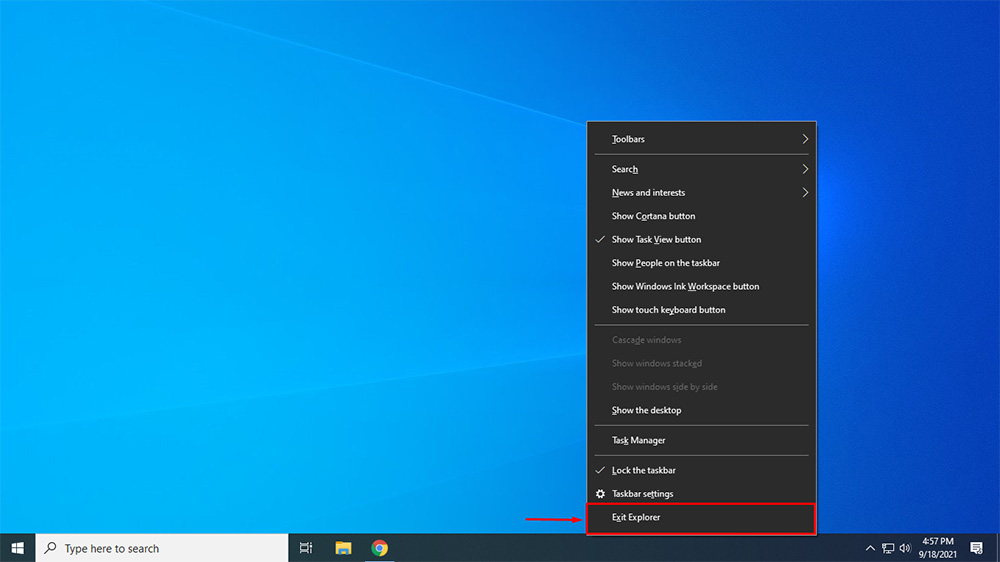
Note: This method will stop the Windows Explorer process and will not start automatically, and you will see a blank black screen with only a mouse pointer. To start the process again, follow the below method.
Steps to start explorer.exe process in Task Manager:
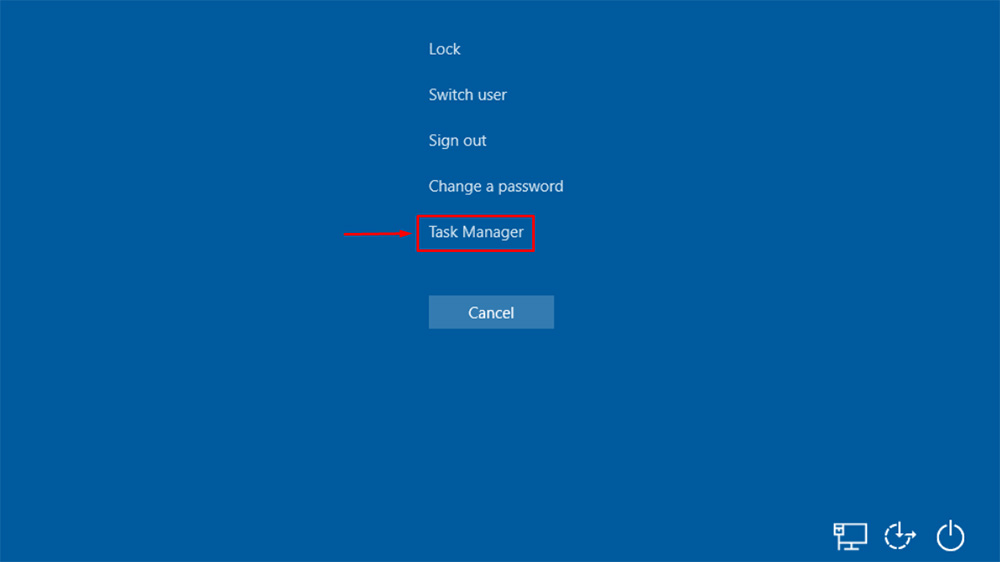
1. Press Ctrl + Alt + Del and click on Task Manager from the menu.
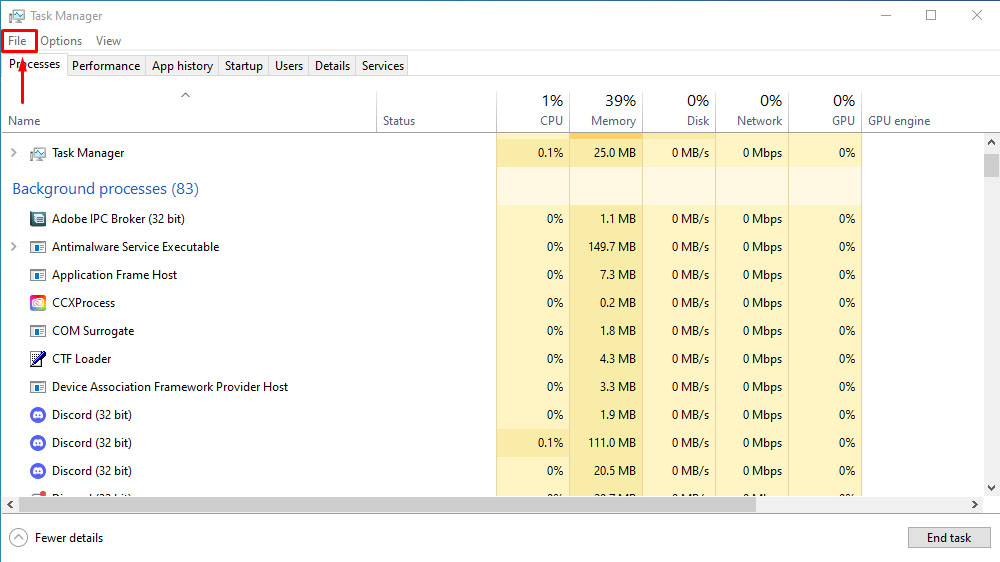
2. In Task Manager, click File.
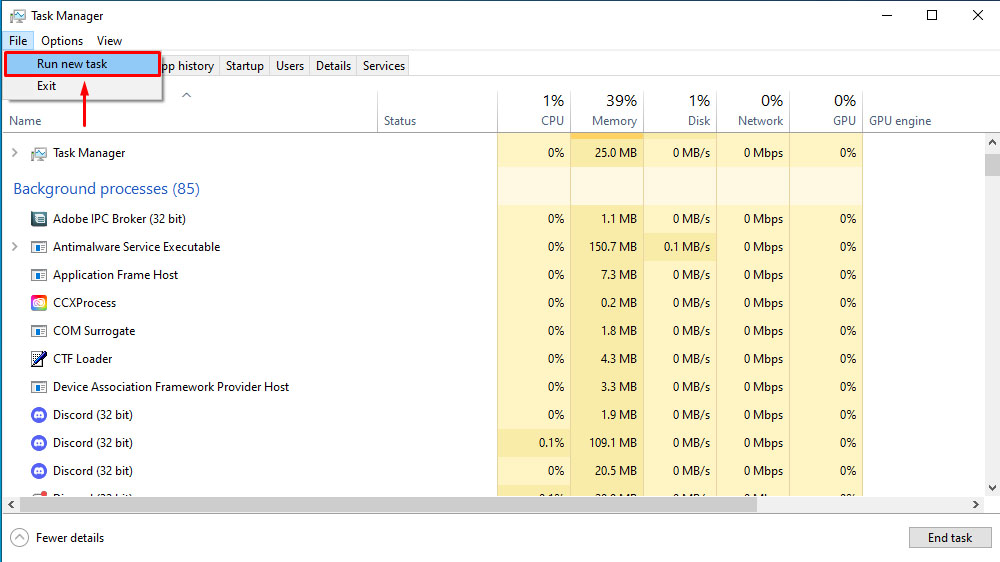
3. Click Run new task.
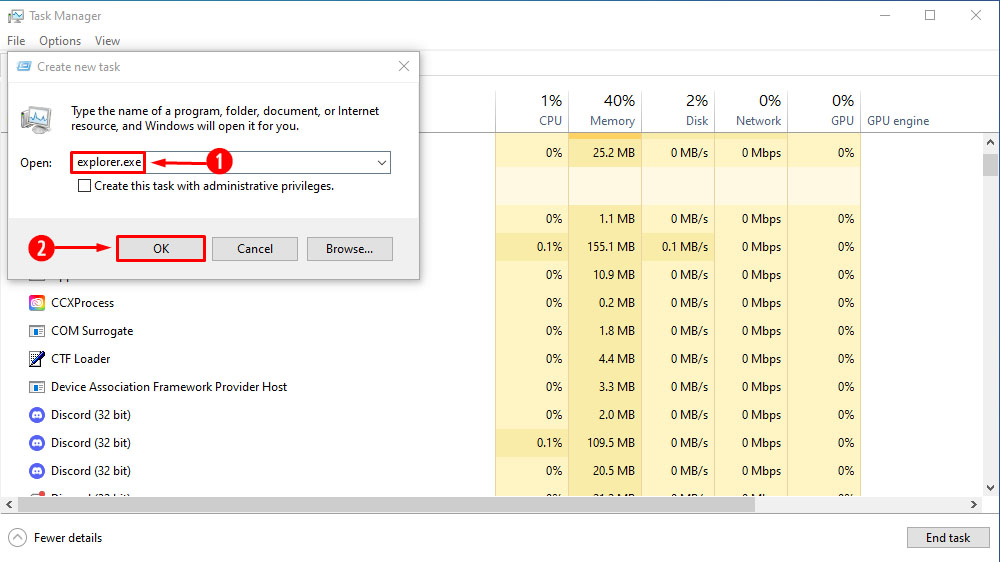
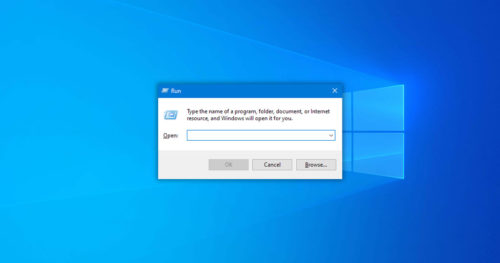
4. In the Run dialog box, type explorer.exe and click OK, and Windows Explorer will start again.
