Having more storage allows you to store more programs, photos, and other data. But if you have bought a new PC or laptop, you may find that the hard drive in your system has only one partition. That means whatever is installed or downloaded will be stored in a single system partition C: drive.
If you want to avoid this, then you can simply shrink the partition to create unallocated space from the system partition and use it as an additional disk. Follow the below article to know how to shrink volume or partition in Windows 10.
Note: You must be signed in as an administrator to shrink a volume or partition.
Method 1: Shrink a Volume or Partition using Disk Management
1. Open Disk Management.
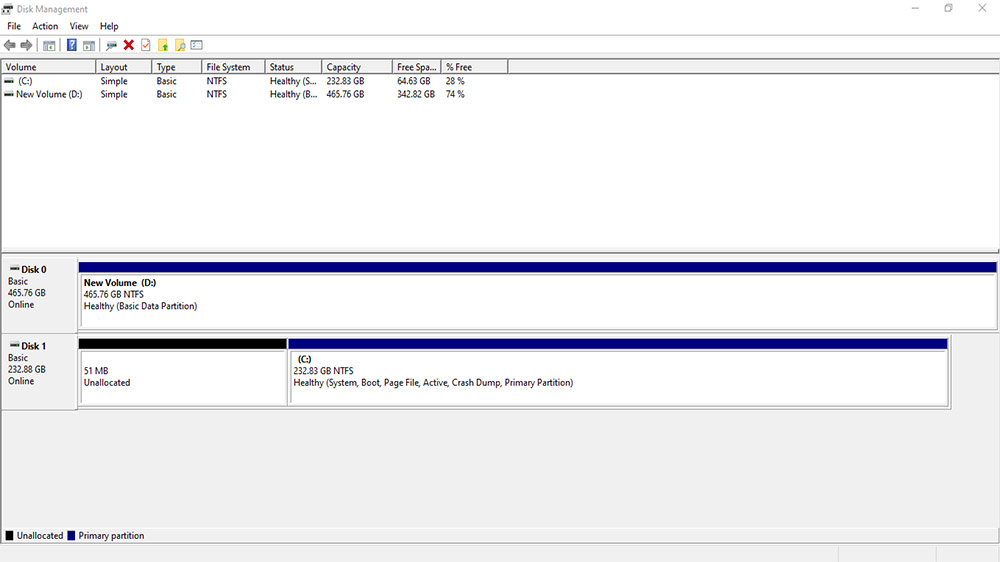
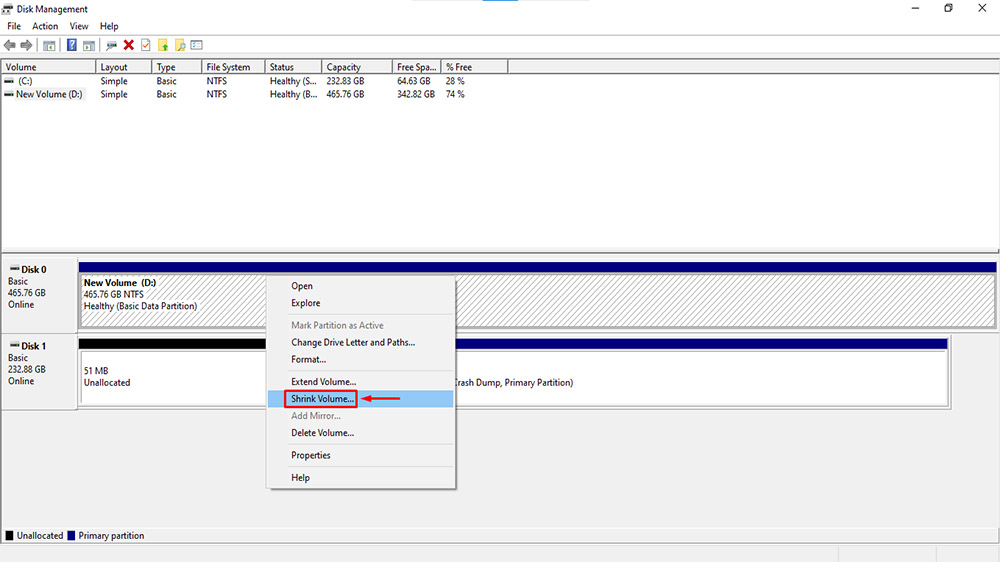
2. Right-click on the drive you want to shrink and click on Shrink Volume.
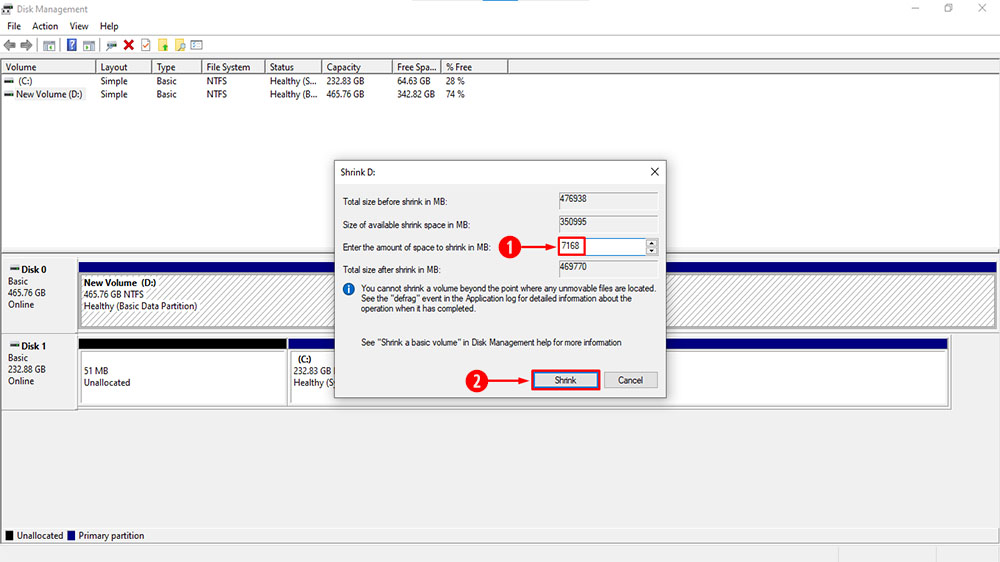
3. Now set how much disk size you want to shrink in MB and click on Shrink.
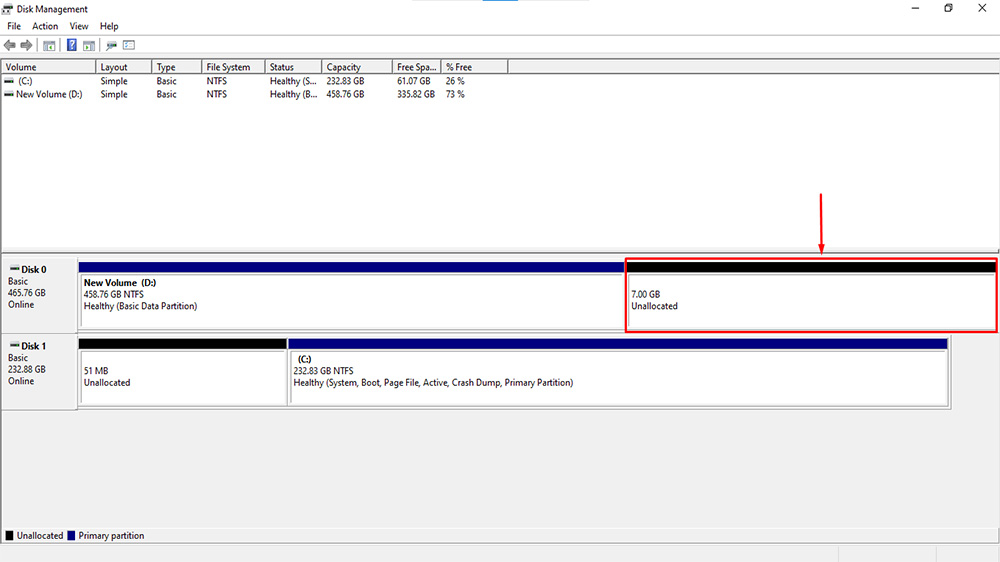
4. Once that is done, you will have an unallocated partition, which you can now create a New Simple Volume to use as an additional disk.
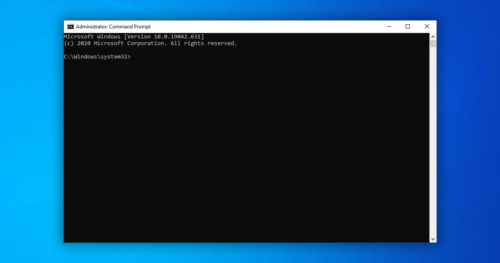
Method 2: Shrink a Volume or Partition using Command Prompt
1. Run Command Prompt as Administrator.
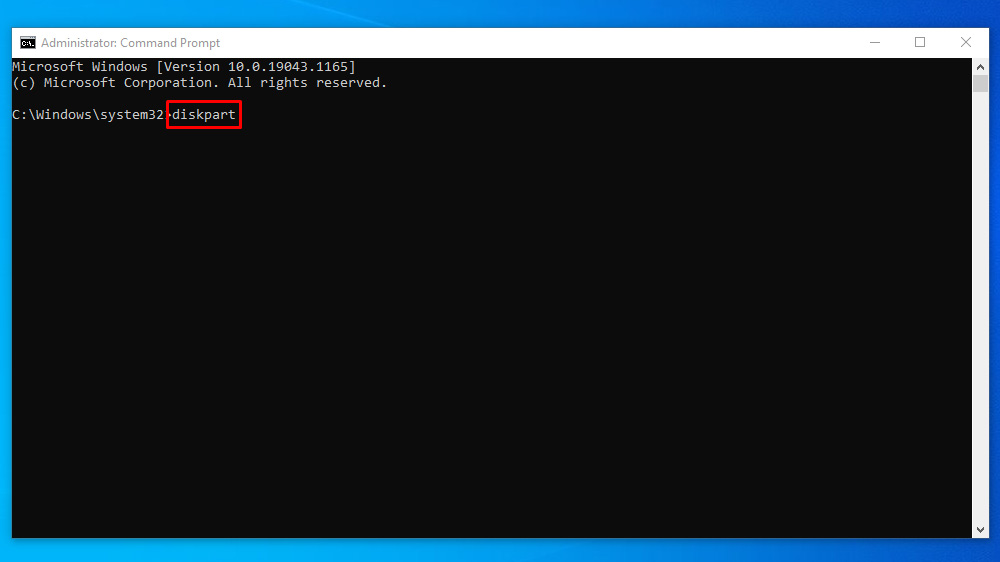
2. Type dispart and hit Enter.
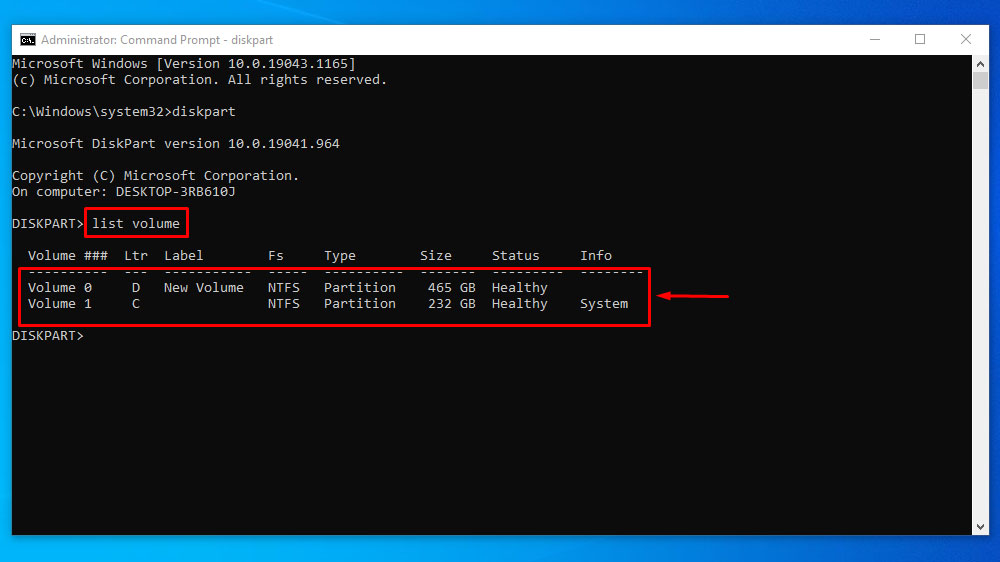
3. You will then see a new Diskpart command line, type list volume, and press Enter to see all available volumes for your drives.
4. Note the Volume number of the partition you want to shrink and type select volume # and hit Enter.
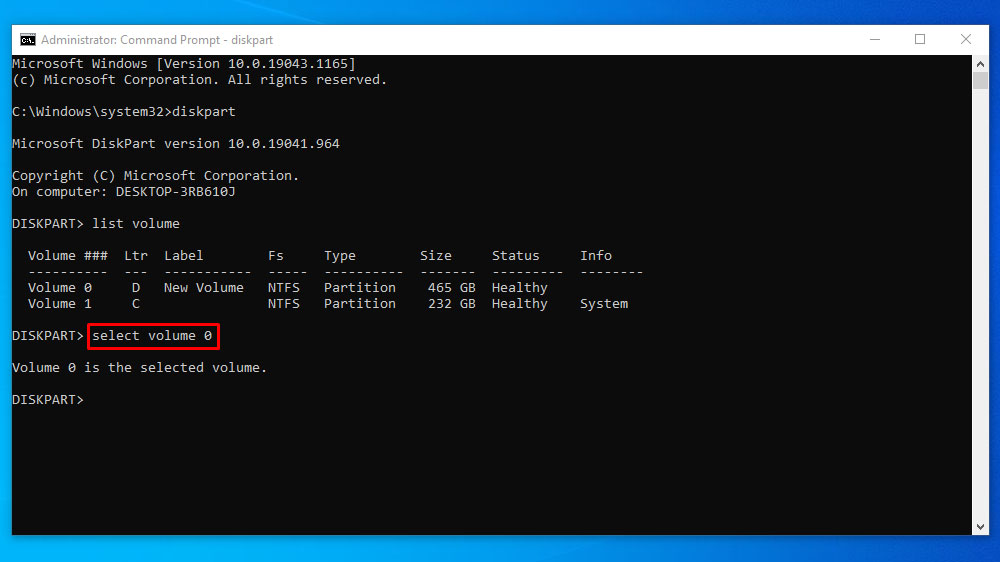
Note: Replace the # with the volume number (e.g., select volume 0).
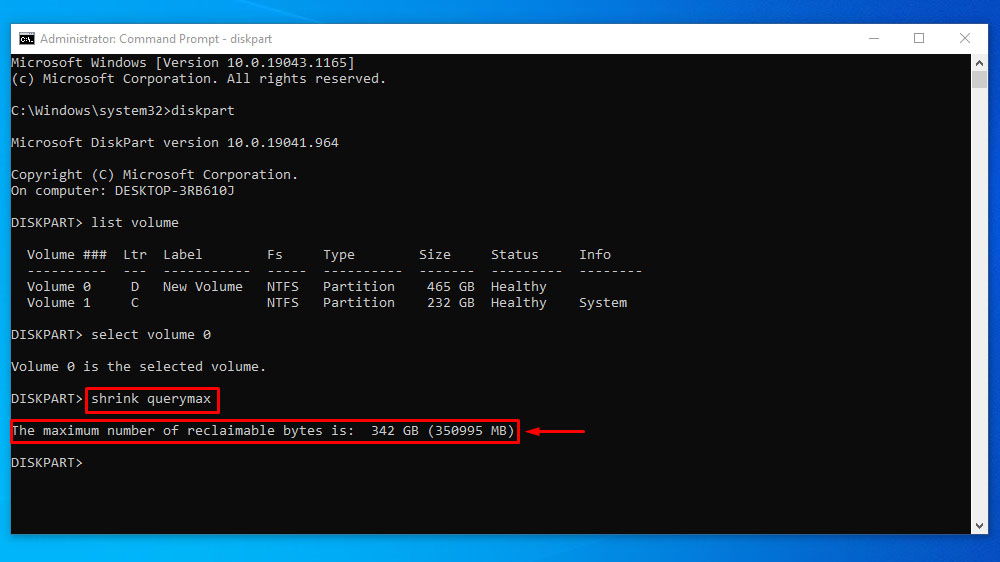
5. Type shrink querymax and note the maximum number of reclaimable bytes you can shrink for the partition.
6. Now type shrink if you want to shrink the maximum reclaimable size or if you want to shrink a specific size then type shrink desired=<size in MB> and hit Enter.
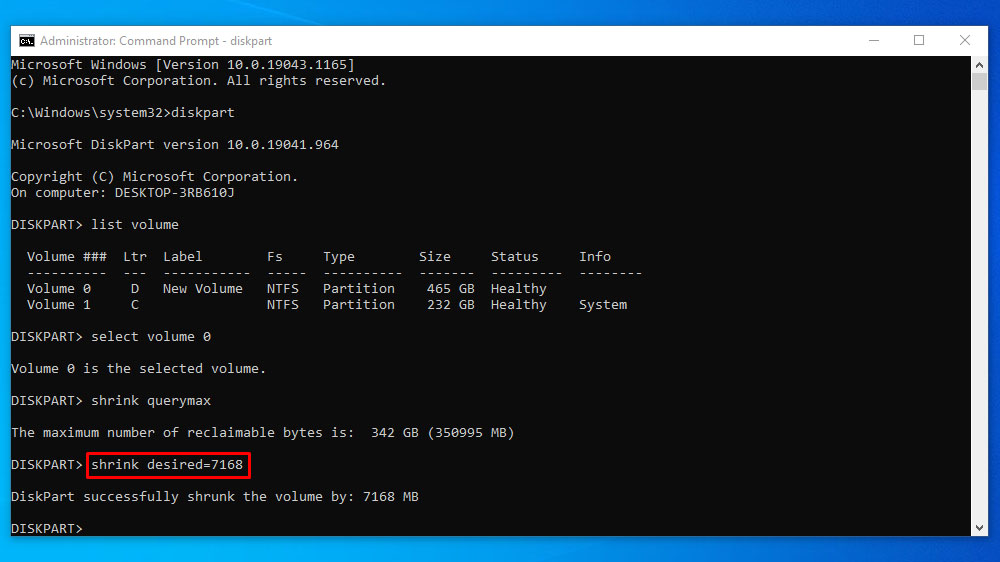
Note: Replace the <size in MB> with the actual size number in MB.
7. Once that is done, you will have an unallocated partition, which you can now create a New Simple Volume to use as an additional disk.
Method 3: Shrink a Volume or Partition using Powershell
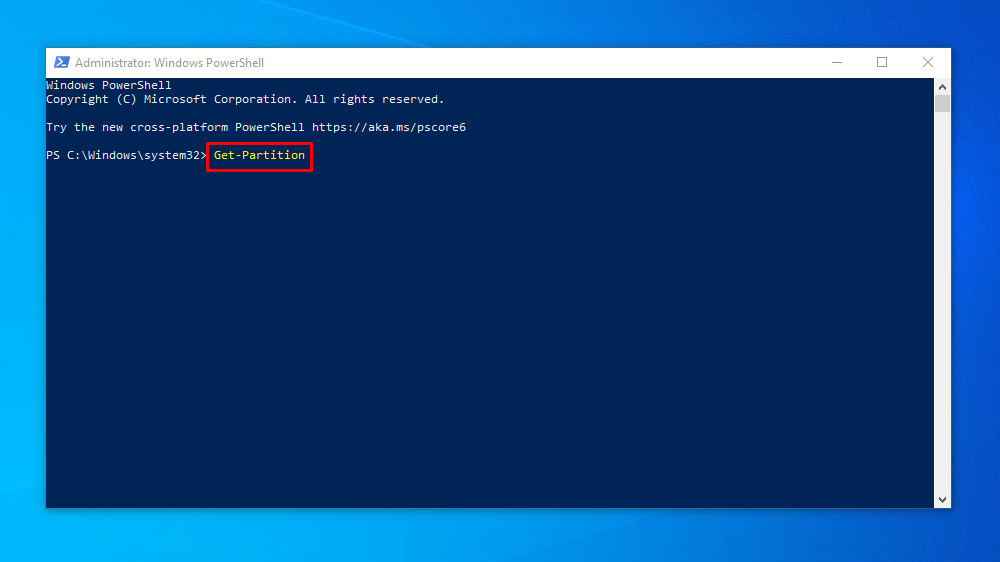
1. Run Powershell as Administrator.
2. Type Get-Partition and hit Enter.
3. From the list of all available partitions of your drives, note the drive letter of the partition you want to shrink. Then type Get-PartitionSupportedSize -DriveLetter <Drive Letter> and hit Enter.
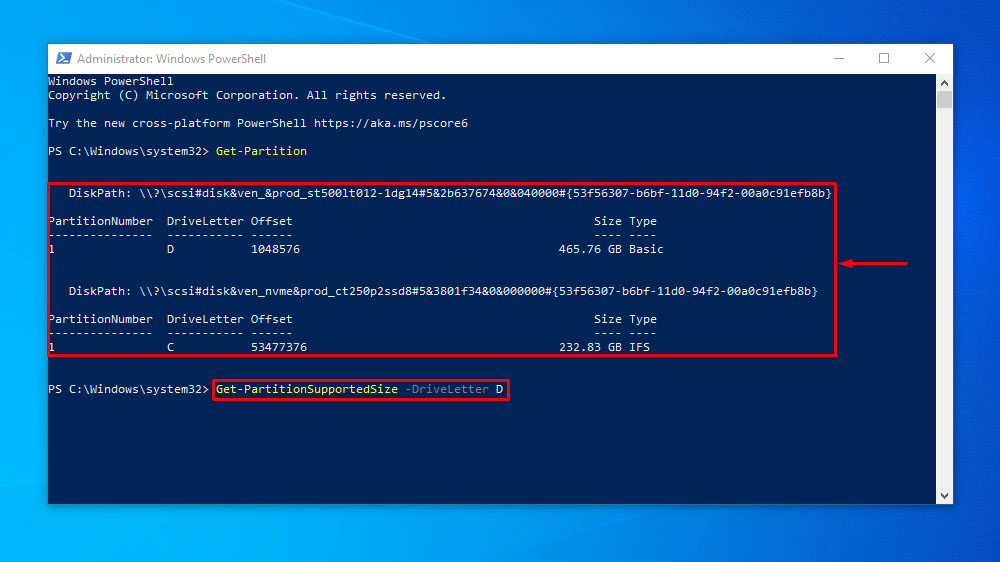
Note: Replace the <Drive Letter> with the drive letter of the partition (e.g., Get-PartitionSupportedSize -DriveLetter D).
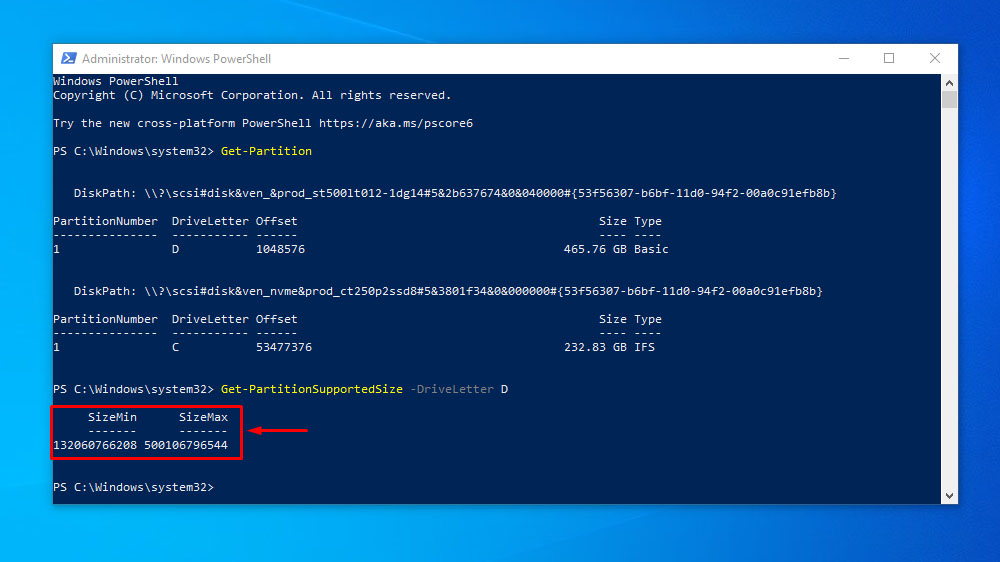
4. You will see a SizeMin (minimum size) and SizeMax (maximum size) you can shrink in bytes.
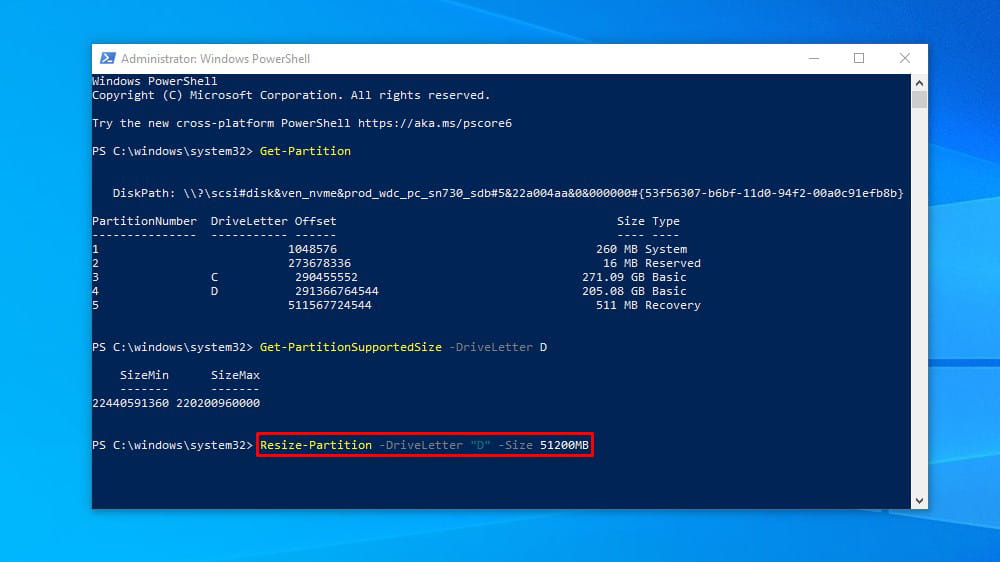
5. Now type:
Resize-Partition -DriveLetter "<Drive Letter>" -Size <Size> (If you want to shrink by size in bytes)
OR
Resize-Partition -DriveLetter "<Drive Letter>" -Size <Size>KB (If you want to shrink by size in KB)
OR
Resize-Partition -DriveLetter "<Drive Letter>" -Size <Size>MB (If you want to shrink by size in MB)
OR
Resize-Partition -DriveLetter "<Drive Letter>" -Size <Size>GB (If you want to shrink by size in GB)
OR
Resize-Partition -DriveLetter "<Drive Letter>" -Size <Size>TB (If you want to shrink by size in TB)
Note: Replace the <Drive Letter> and <Size> with the drive letter of the partition and actual number in Bytes, KB, MB, GB, TB. (e.g., Resize-Partition -DriveLetter "D" -Size 7168MB)
6. Once that is done, you will have an unallocated partition, which you can now create a New Simple Volume to use as an additional disk.