In Windows, whenever you add a new hard drive or create a new volume or partition, Windows mounts them by assigning drive letters. E.g., drive assigned with letter C: is always used to store Windows operating system and letter D: and E: are normally secondary hard drives or optical drives.
When you unmount a drive or volume, it becomes inaccessible to the user, and you can’t read or write it. So it could be useful if you have a certain drive or volume you don’t use that usual and want to keep your PC organized.
In Windows, the process of mounting and unmounting a drive or volume is done by adding or removing the assigned drive letter of that drive. There are two methods you can use to mount or unmount a drive or volume.
Method 1: Unmount Drive or Volume Using Disk Management
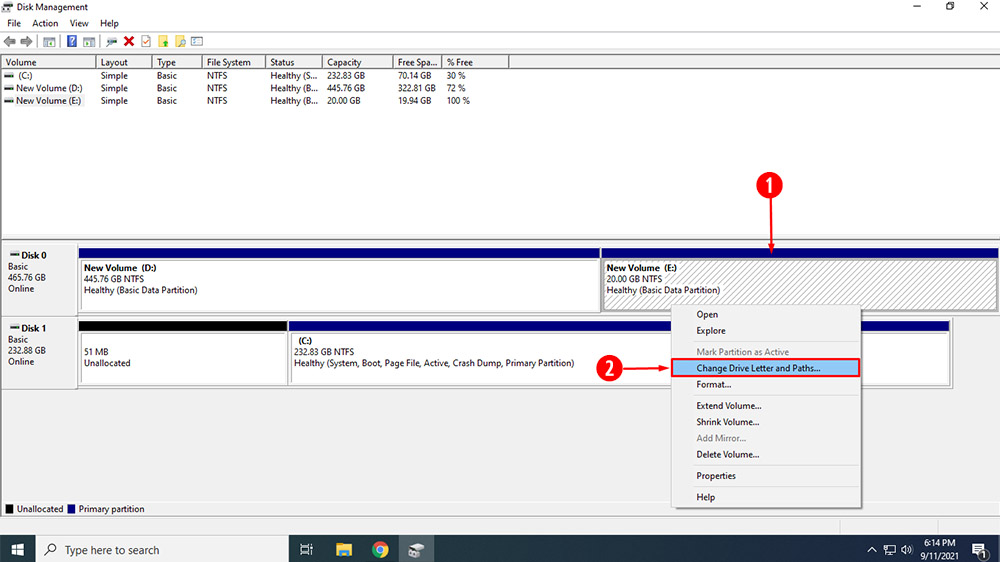
1. Open Disk Management.
2. Right-click on the drive or volume you want to unmount and click Change Drive Letter and Paths.
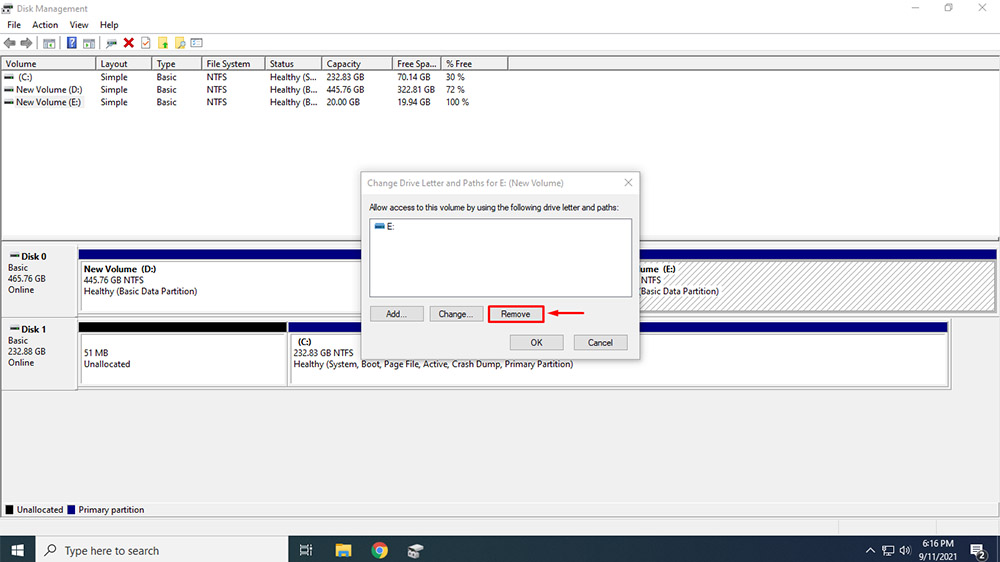
3. On Change Drive Letter and Paths dialog box, click on Remove.
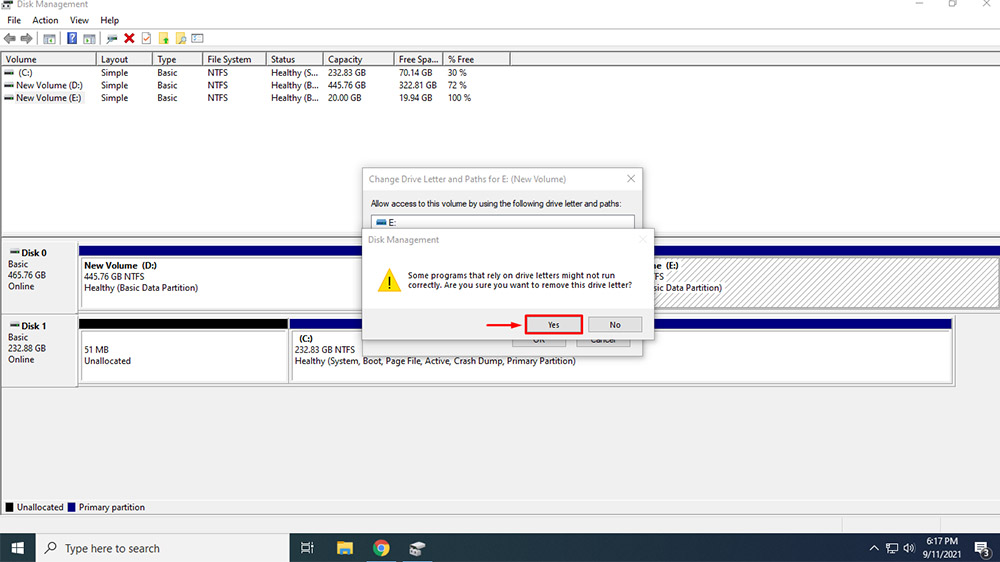
4. Click on Yes to confirm the action.
5. Once done, close the Disk Management.
Method 2: Unmount Drive or Volume Using Diskpart
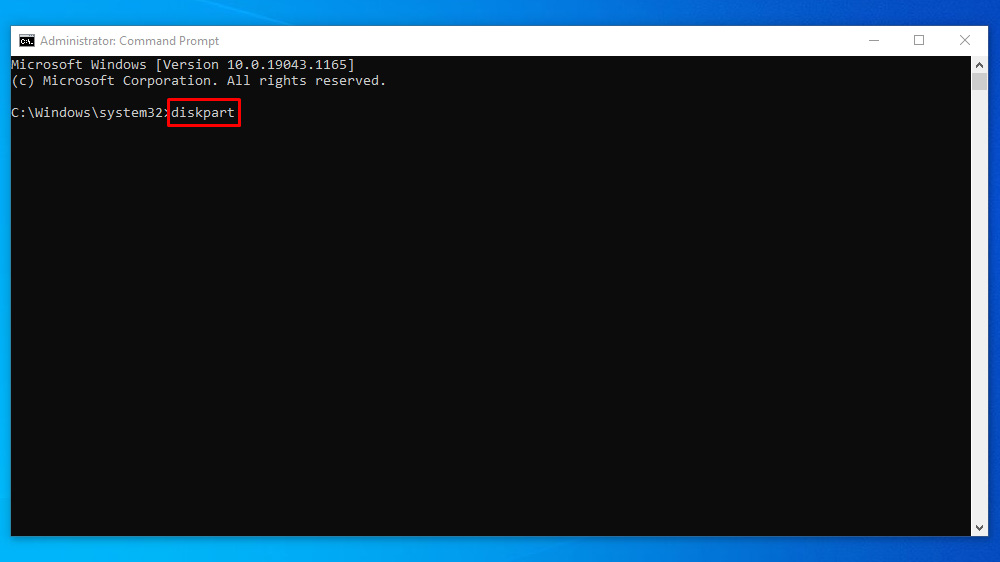
1. Run Command Prompt as Administrator.
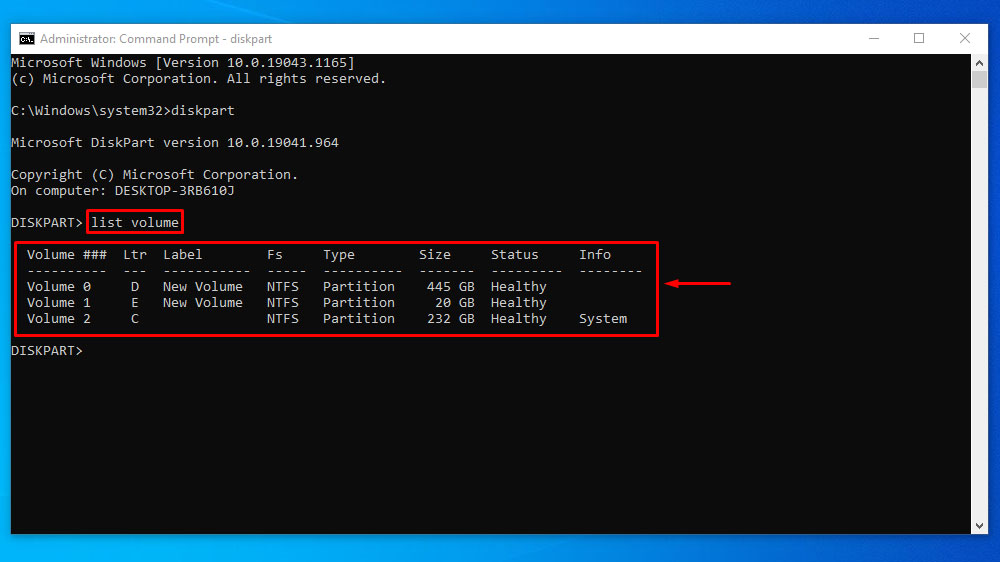
2. Type diskpart and press Enter.

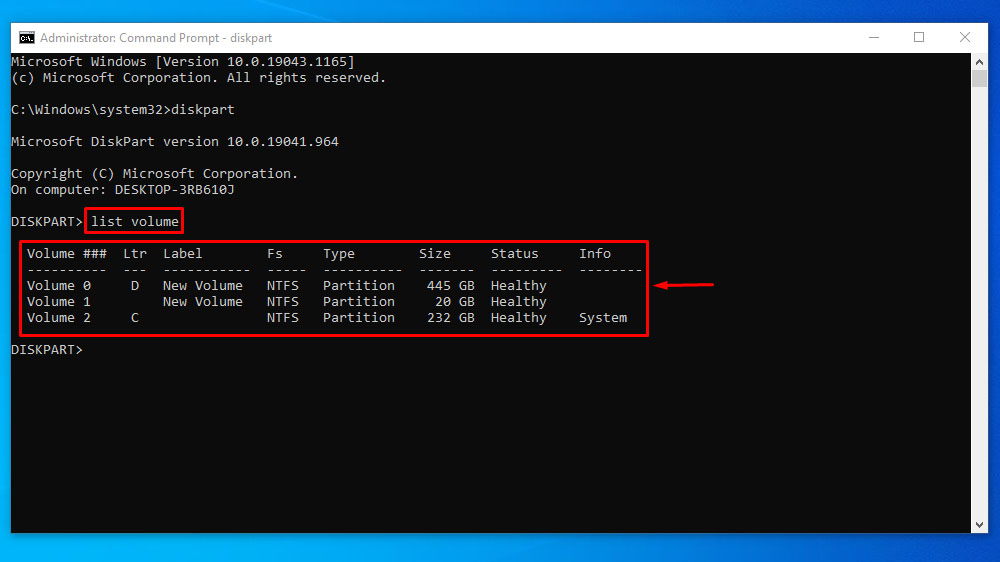
3. You will then see a new Diskpart command line, type list volume, and press Enter to see all available volumes for your drives. Note the Volume number of the partition you want to unmount
4. Type select volume # and hit Enter.
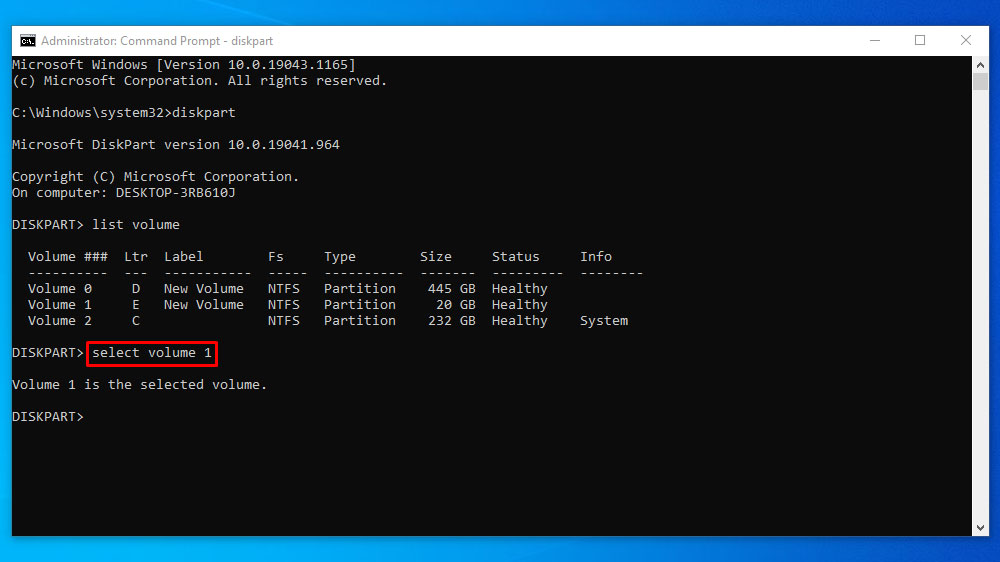
Note: Replace the # with the volume number (e.g., select volume 1).
5. Now type remove letter # and hit Enter.
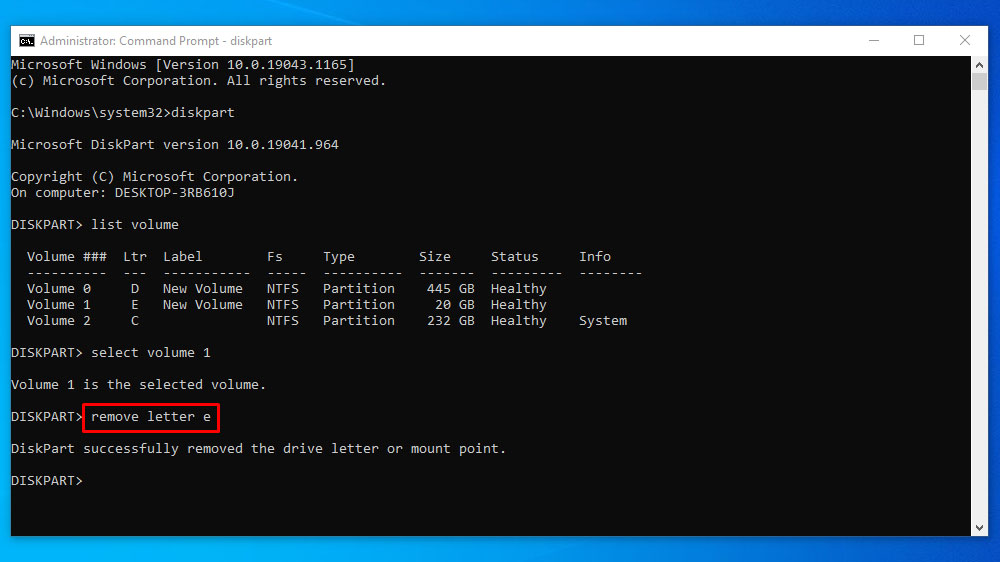
Note: Replace the # with the drive’s letter you want to unmount (e.g., remove letter e).
Method 3: Mount Drive or Volume Using Disk Management
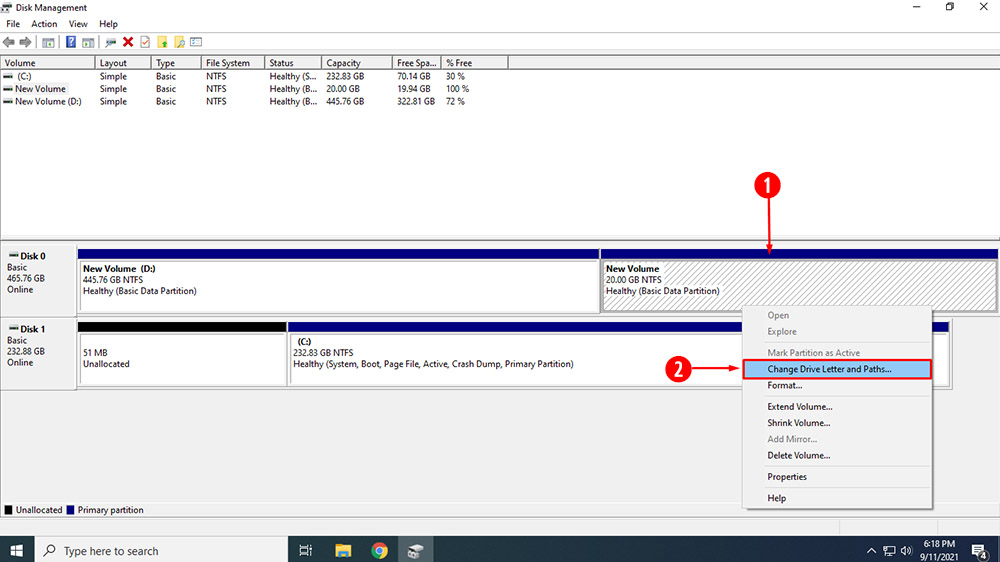
1. Open Disk Management.
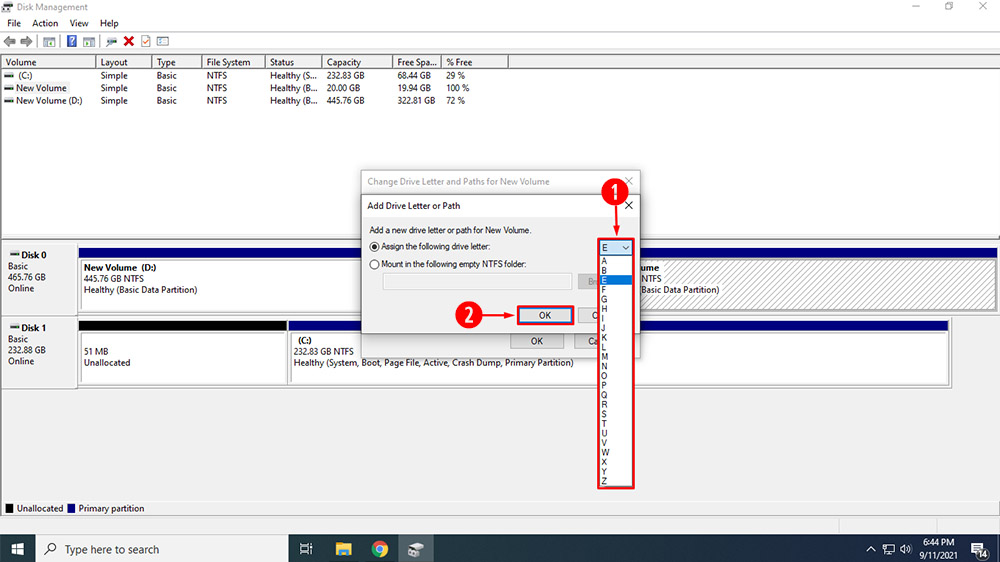
2. Right-click on the drive or volume you want to mount and click Change Drive Letter and Paths.
3. On Change Drive Letter and Paths dialog box, click on Add.
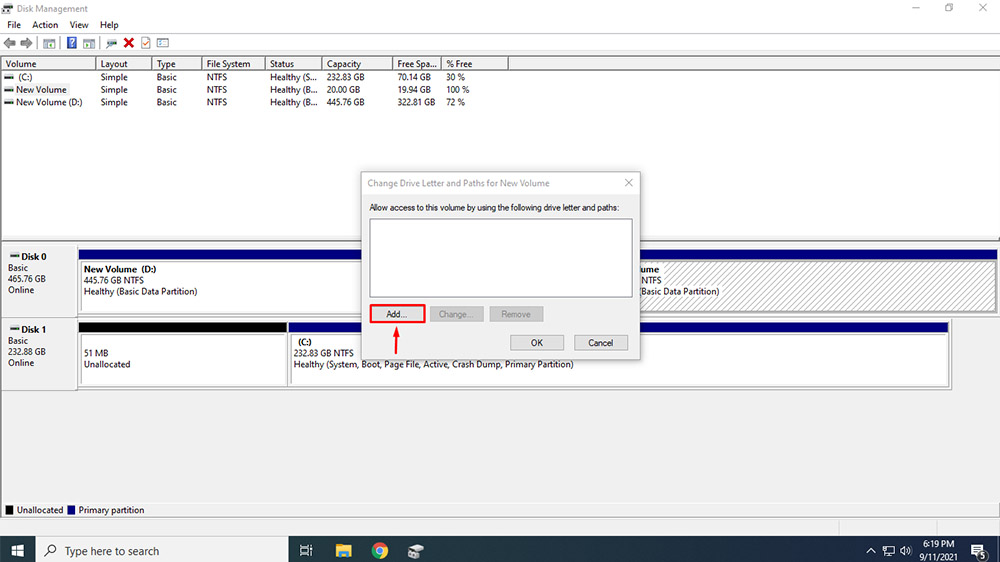
4. Choose the drive letter you want to assign from the drop-down and click OK.
5. Once done, close the Disk Management.
Method 4: Mount Drive or Volume Using Diskpart
1. Run Command Prompt as Administrator.
2. Type diskpart and press Enter.
3. You will then see a new Diskpart command line, type list volume, and press Enter to see all available volumes for your drives.
4. Note the Volume number of the partition you want to mount, type select volume #, and hit Enter.
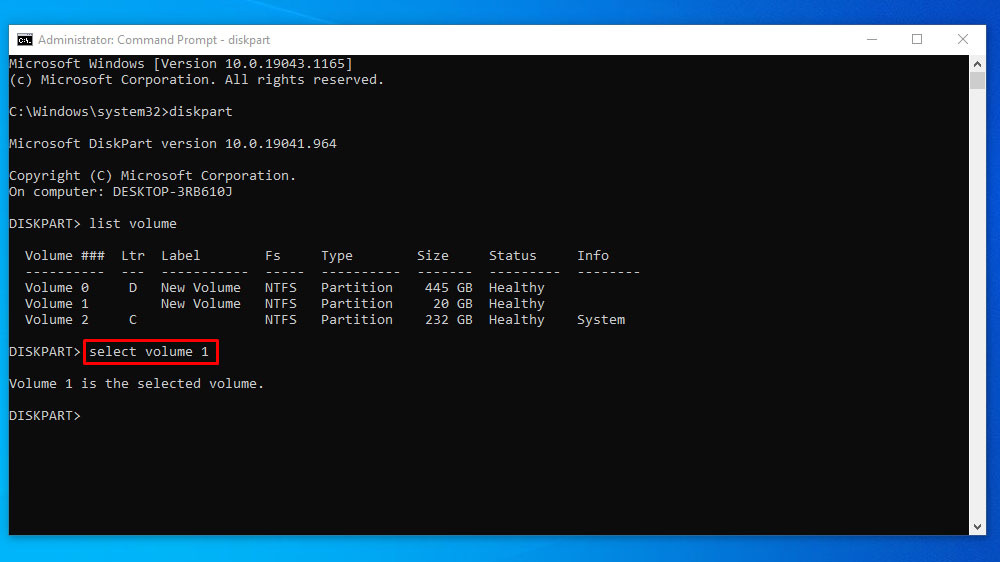
Note: Replace the # with the volume number (e.g., select volume 1).
5. Now type assign letter # and hit Enter.
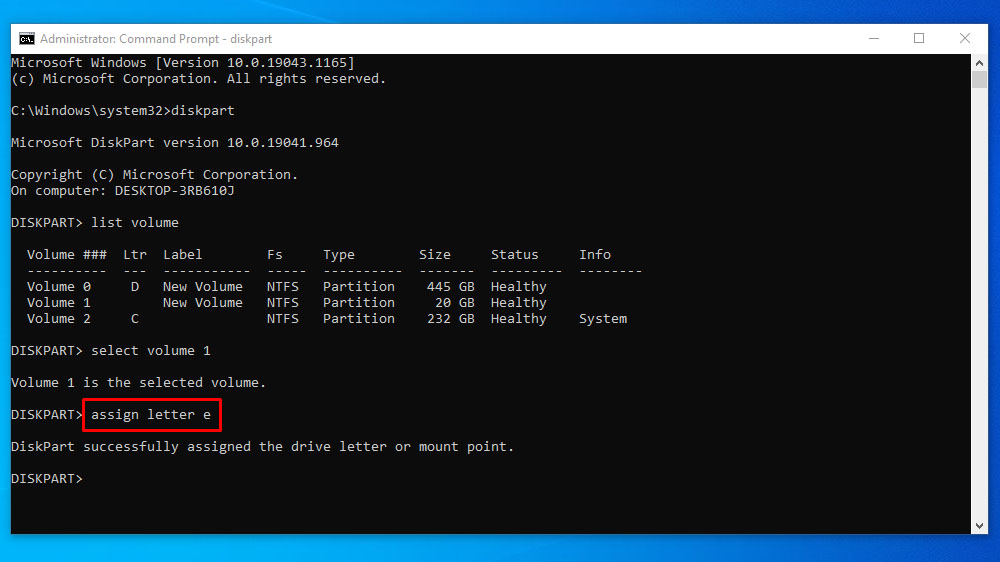
Note: Replace the # with the drive’s letter you want to assign (e.g., assign letter e).