Driver Signature Enforcement is a feature in Windows that checks digital signature or an electronic fingerprint associated with driver packages. Driver Signature Enforcement ensures that the driver provided by the vendor is safe and hasn’t been modified by a malicious third party.
But many manufacturer drivers aren’t digitally signed, leading you to get stuck with the “Windows requires a Digitally Signed Driver” message. However, there’s a straightforward workaround to this problem, requiring you to disable the Driver Signature Enforcement on your PC either temporarily or permanently.
Note: Installing an unsigned driver on your PC can lead to all sorts of problems, so install an unsigned driver only when you trust it to be safe. Also, make sure to back up your system to protect your important data.
Method 1: Temporarily Disable Driver Signature Enforcement using Advanced Startup Settings at Boot
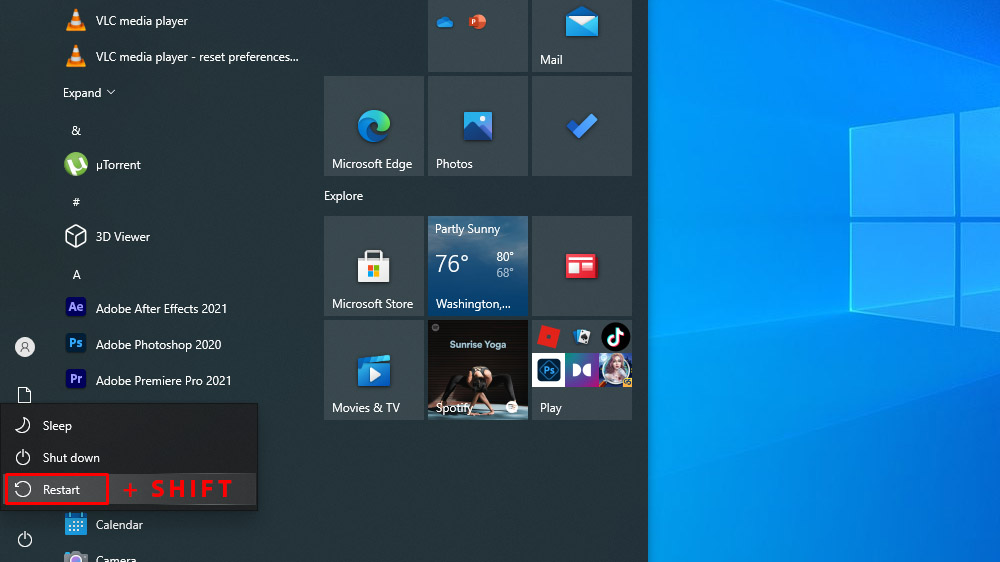
1. Restart your PC while holding the Shift button on your keyboard.
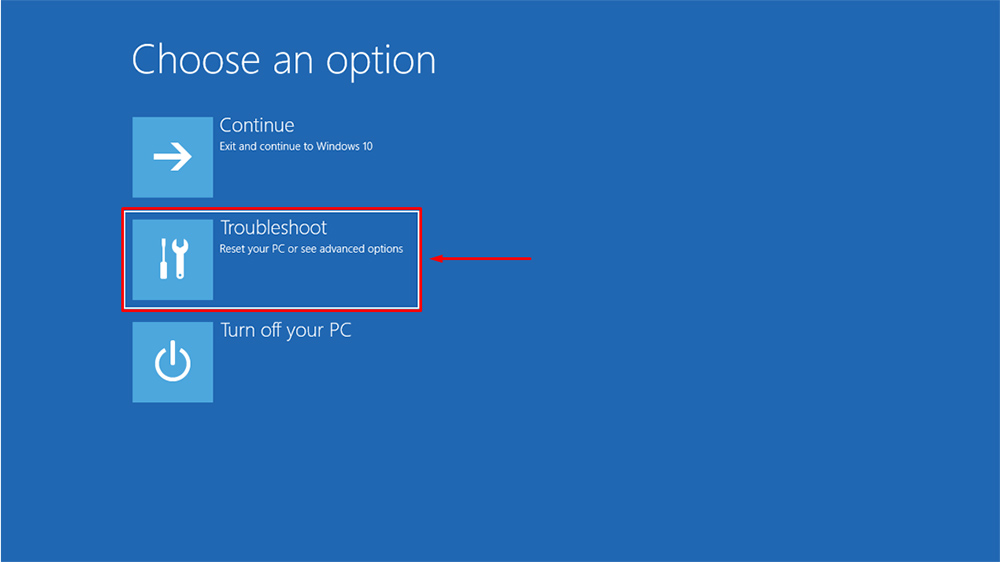
2. Once in the Troubleshoot option, click on Troubleshoot.
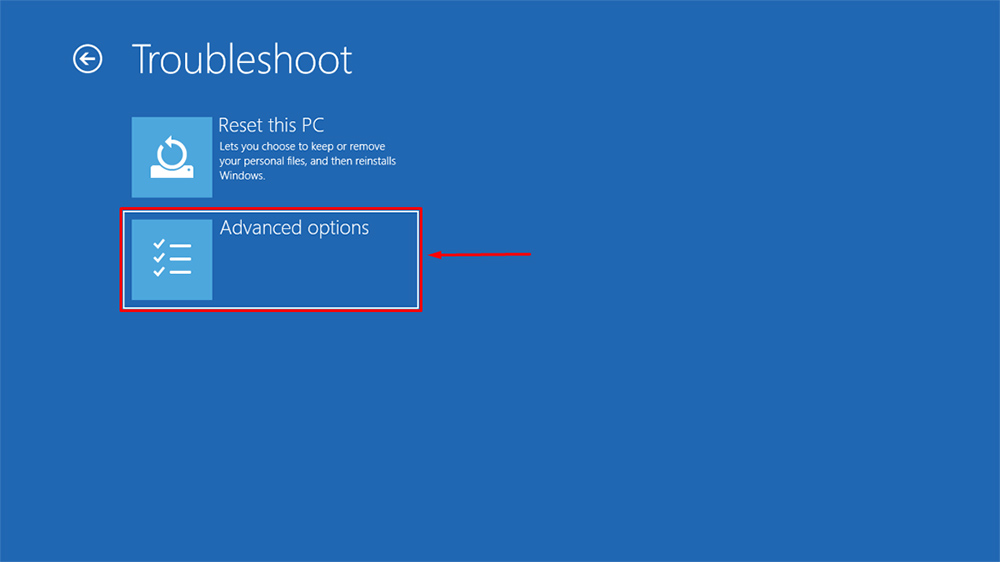
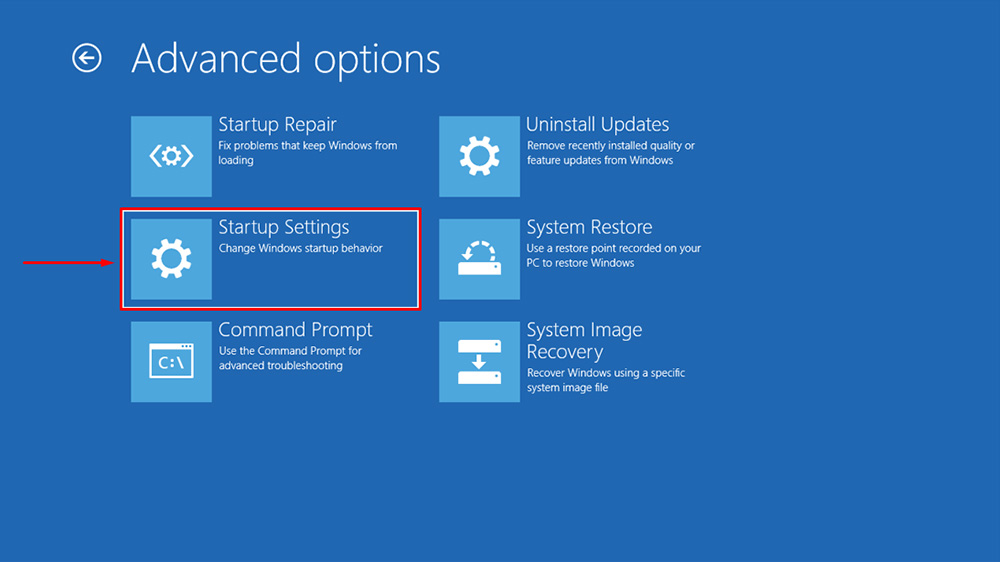
3. Then click on Advanced options.
4. In Advanced options, click on Startup Settings.
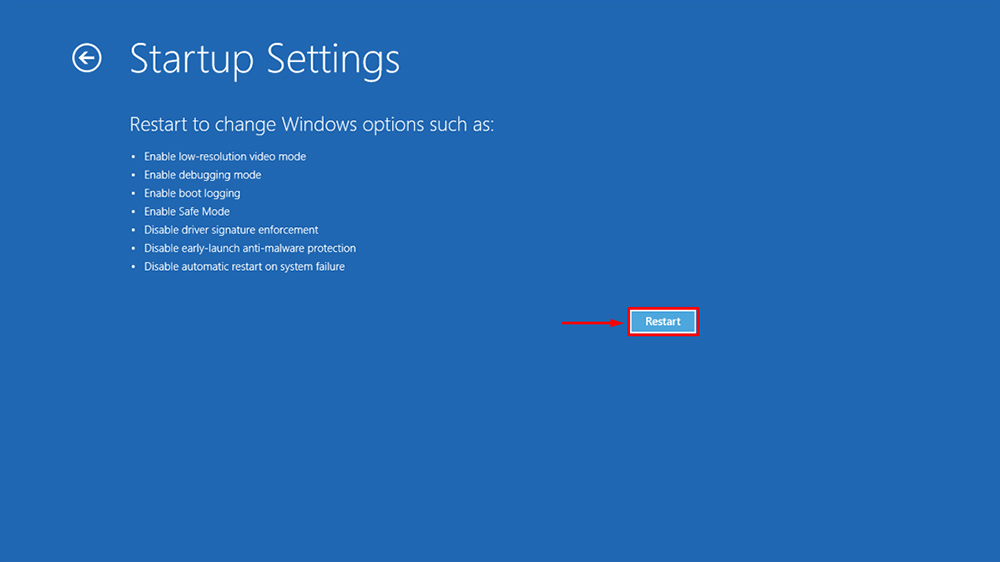
5. In Startup Settings, click on the Restart to edit the Driver Signature enforcement settings.
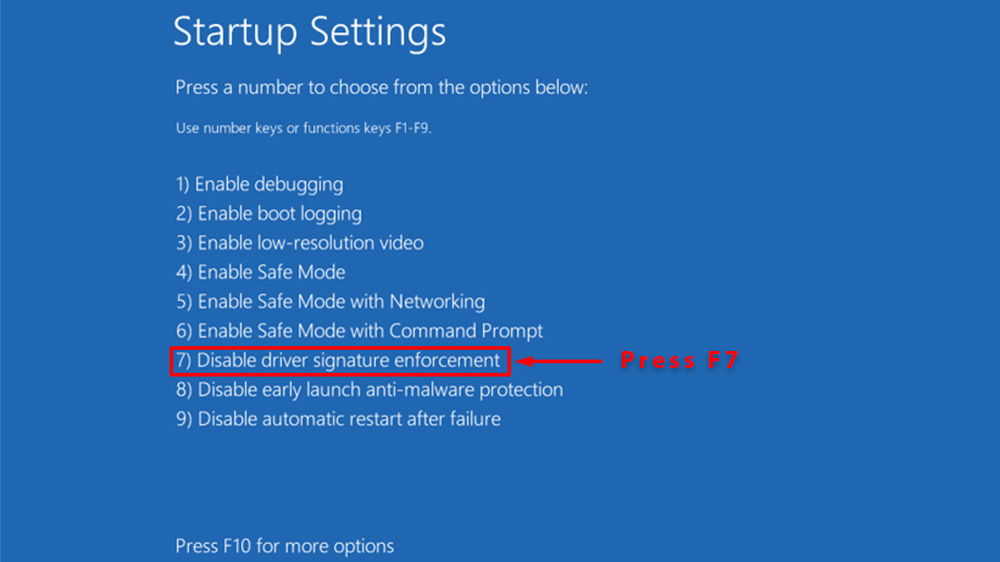
6. Once restarted, Press F7 on your keyboard to select Disable driver signature enforcement from the list of options.
7. Your PC will restart again, and now you should be able to install unsigned drivers.
Note: This method only lasts temporarily. If you Restart your computer again, it’d be enabled by default.
Method 2: Enable or Disable Driver Signature Enforcement using Test Mode
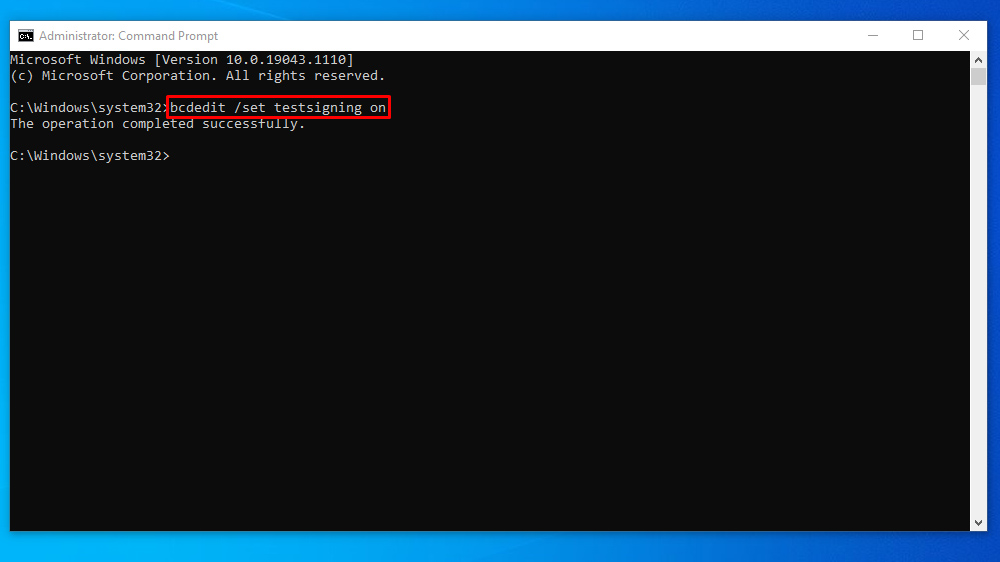
1. Run Command Prompt as Administrator.
2. Put the following command in the Command Prompt and hit Enter.
bcdedit /set testsigning on
3. Close the Command Prompt window and restart your computer.
Note: Enabling Test mode will let you install unsigned drivers until you disable it again. In Test mode, if you get an error while installing unsigned drivers, you have to disable Secure Boot in the boot.
Method 3: Enable or Disable Driver Signature Enforcement using Command Prompt
1. Run Command Prompt as Administrator.
2. Put the following command in the Command Prompt and hit Enter.
bcdedit.exe /set nointegritychecks on
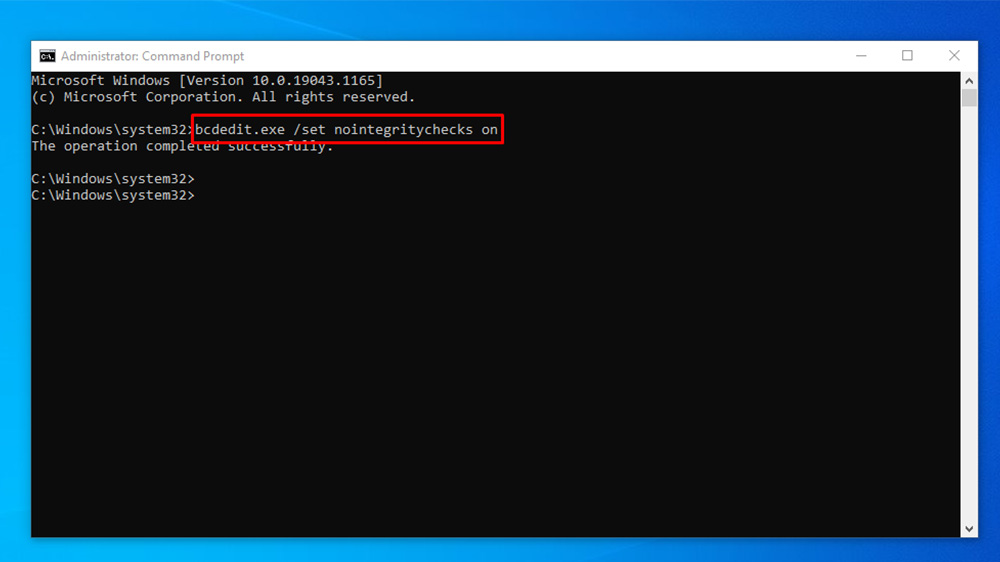
3. Close the Command Prompt window and restart your computer.