Whenever you install a fresh Windows copy or buy a new PC, it comes with a recovery partition on the disk that helps restore the OS to its factory settings if there is a system failure of some kind. However, every time Windows rolls out an update, a new partition is created. Leaving you with excess recovery partitions taking up additional space on your hard drive.
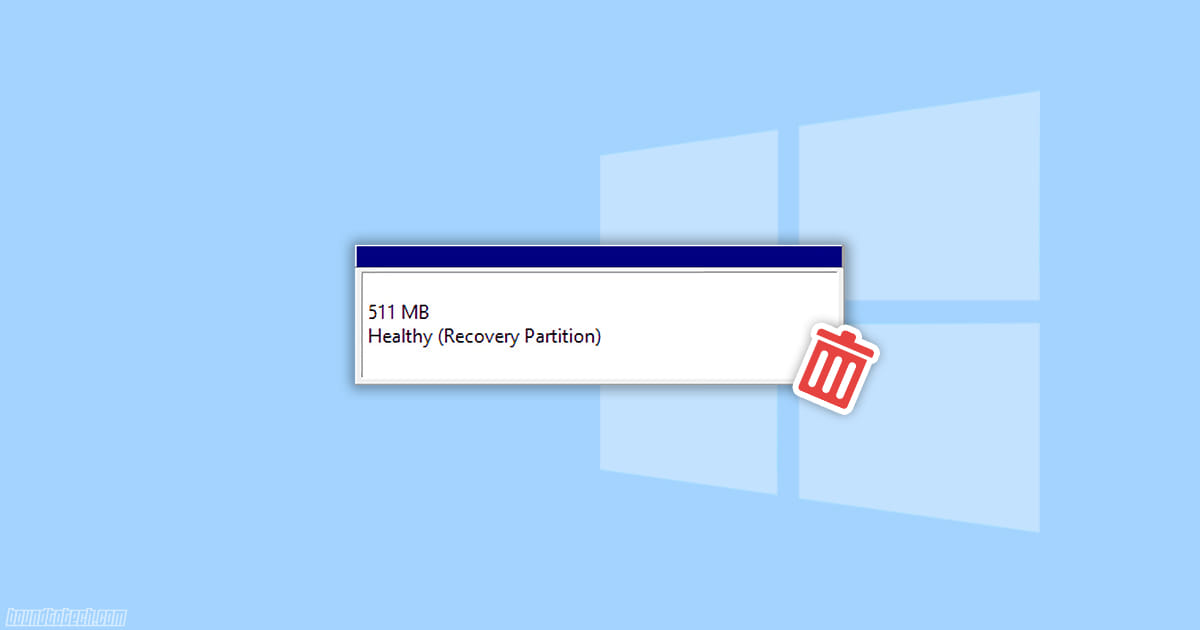
The recovery partition doesn’t have a drive letter or path. You can only find it in Disk Management. Here’s how the recovery partition looks in the Disk Management:
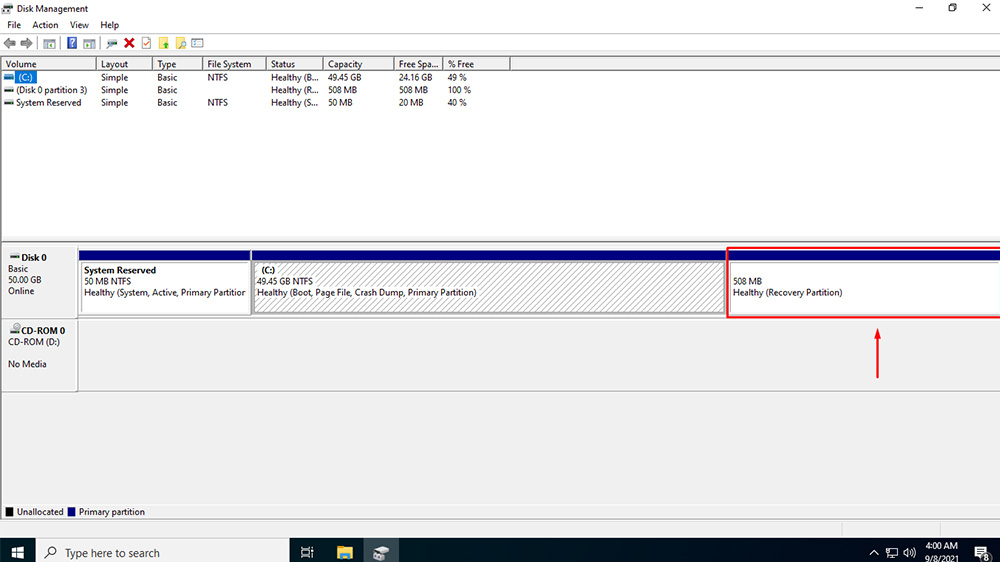
If you have more than one recovery partition, which is essentially useless, you can remove it to free up some space on your hard drive. The below guide will show you how to delete the recovery partition in Windows 10.
Note: Before doing the below steps, be sure to take a backup of your Windows first.
Deleting Recovery Partition using Dispart
1. Run Command Prompt as Administrator.
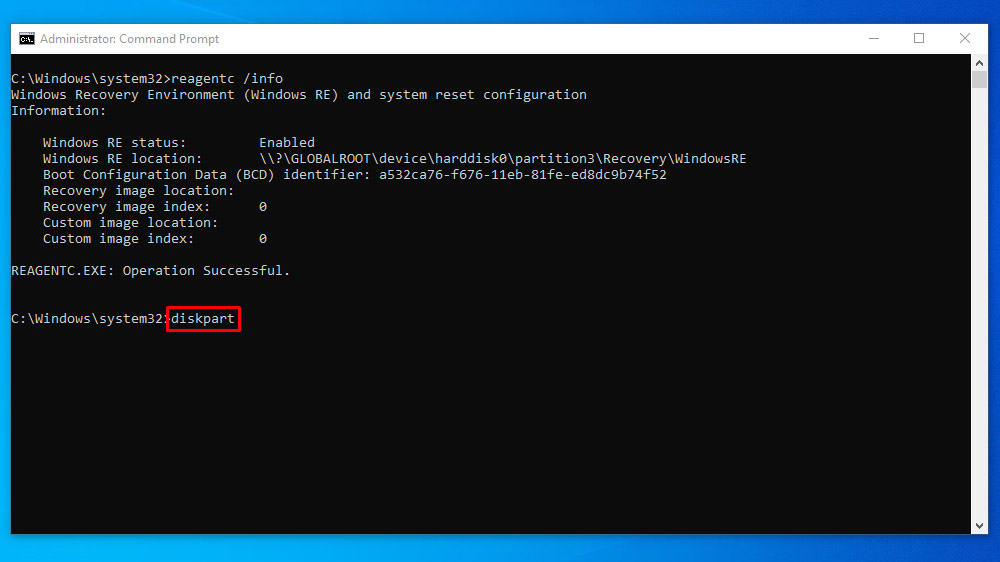
2. Then type reagentc /info and press Enter.
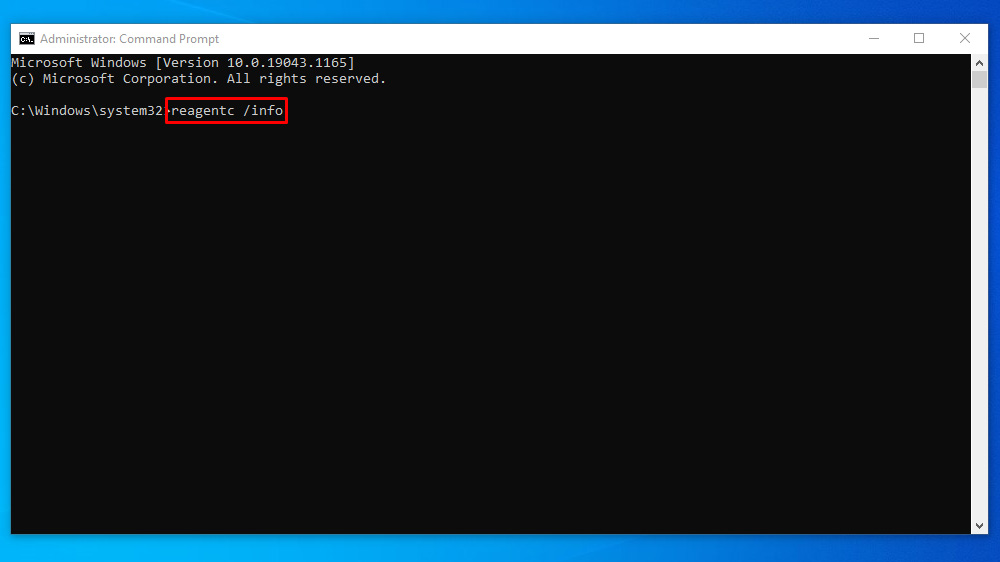
3. You will be provided with information related to the recovery partitions and their locations. Note the number of the disk and partition you want to delete. (e.g., harddisk0 and partition3).
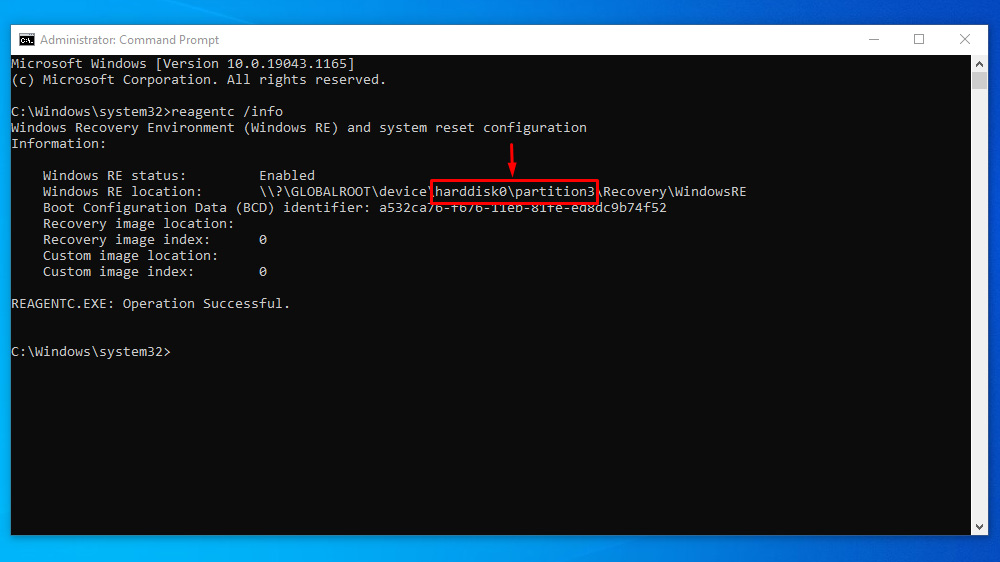
4. Now type diskpart in Command Prompt and press Enter.
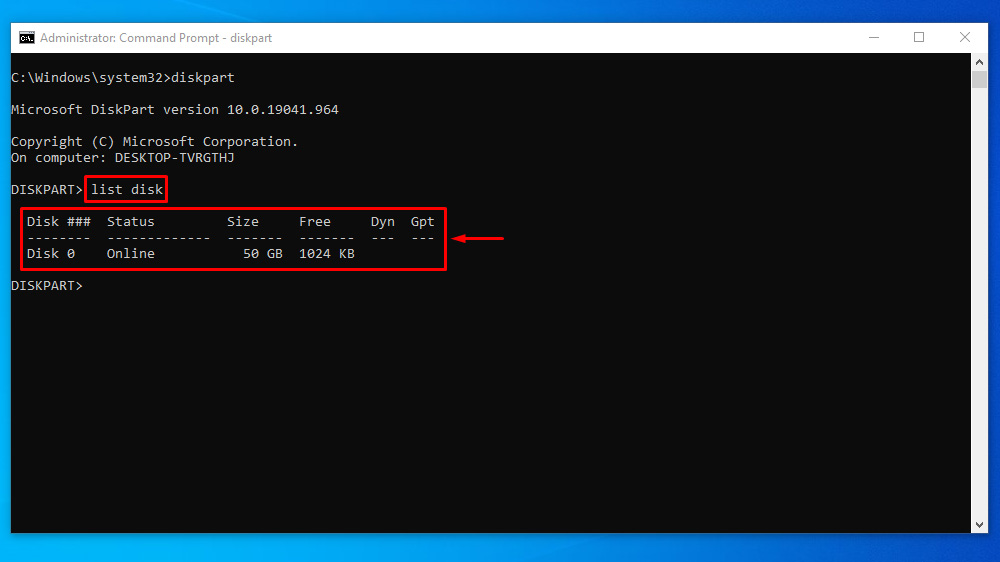
5. You will then see a new Diskpart command line, type list disk, and press Enter to see all available disks.
6. Type select disk # and press Enter.
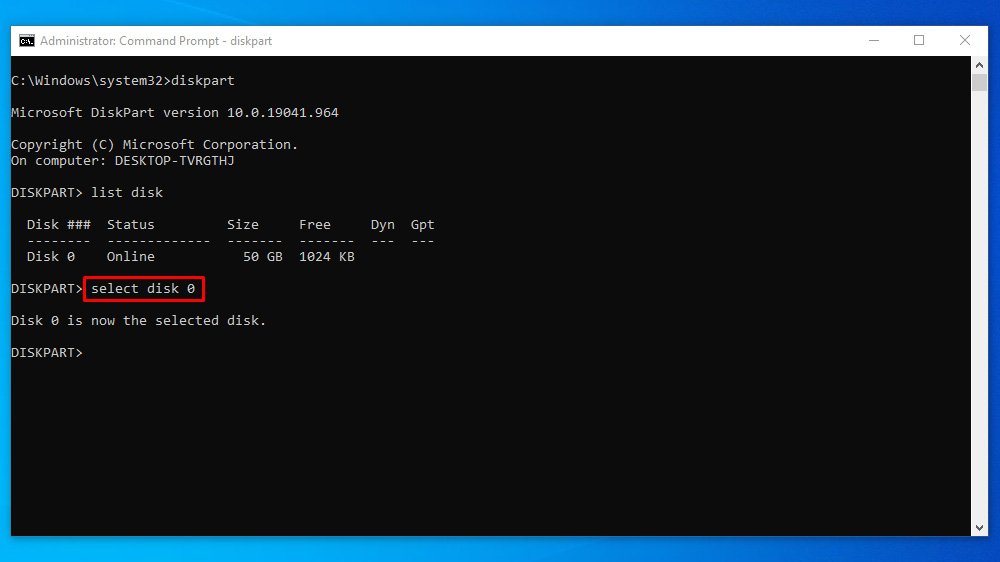
Note: Replace # with the disk number that contains the recovery partition.
7. Type list partition and press Enter to see all available partitions.
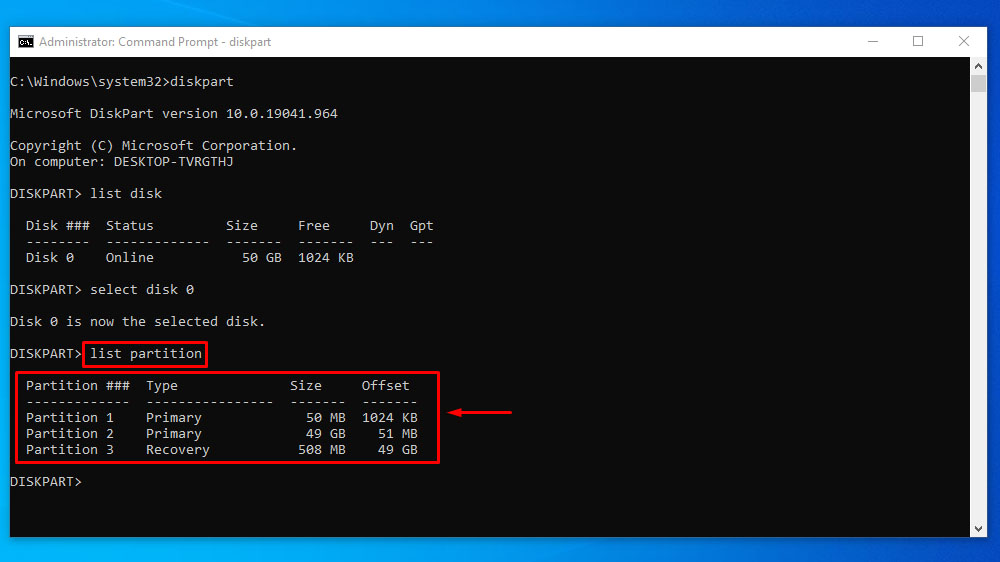
8. Then type select partition # and press Enter.
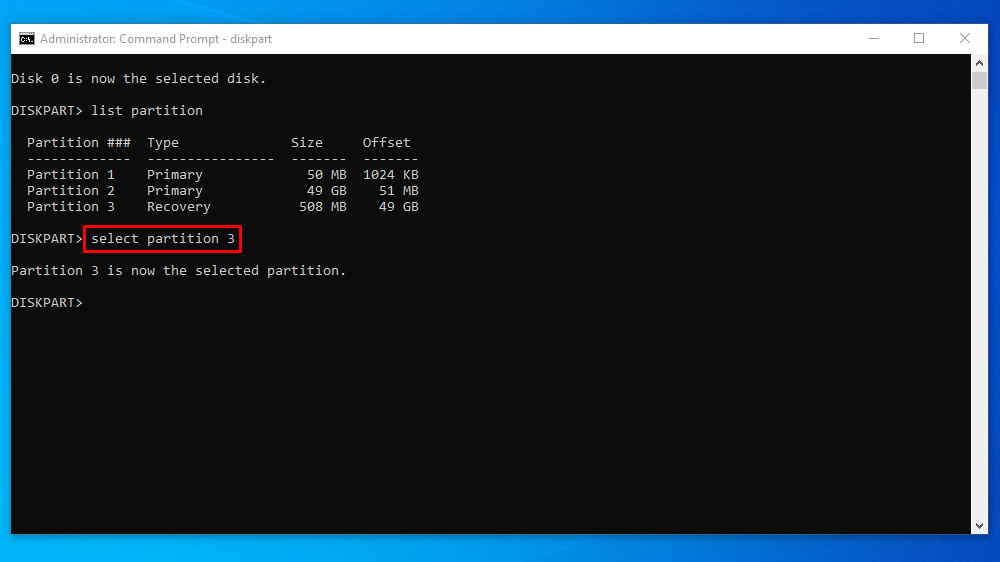
Note: Replace # with the partition number that’s assigned to the recovery partition you want to delete.
9. Now to delete the partition, type delete partition override and press Enter.
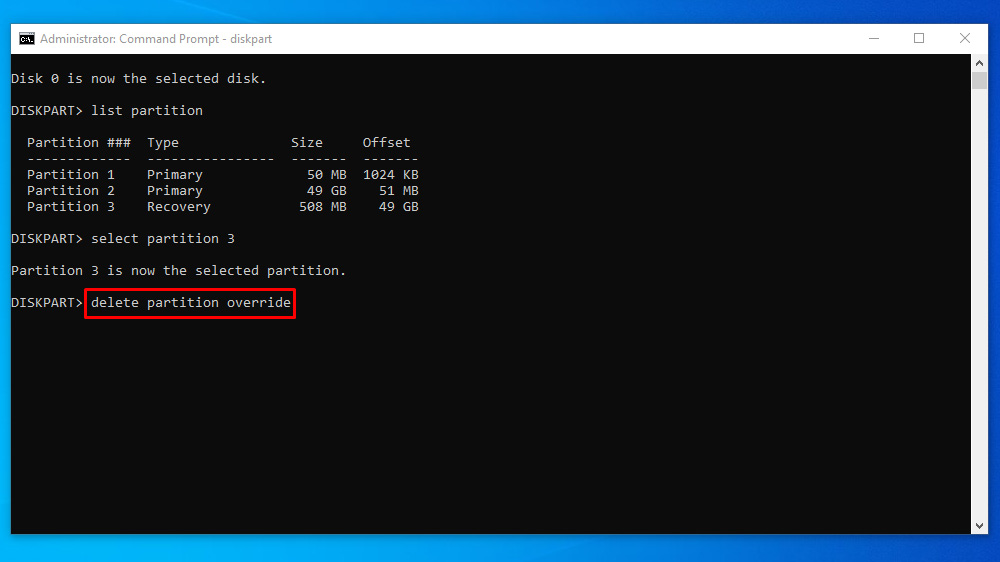
10. Once that is done, you will have an unallocated partition, which you can extend into another partition.
